
In Microsoft Clipchamp, you can import video assets in 4K resolution and make them part of your editing project. This is possible on any account tier, free and paid.
When it's time to export and save your video, Premium subscribers for Clipchamp's personal version and Clipchamp's work version (4K support in the work version is coming soon) can export in super crisp, ultra-high definition (3840p resolution and 70mbps).
Here is how to work with 4K videos in Clipchamp.
Note: The screenshots in this article are from Clipchamp's personal version. The same principles apply to Clipchamp for work accounts.
Upload your 4K clips
To import your 4K media, select the import media button on the toolbar. Here, you can upload your 4K videos from your computer, or use one of our integrations like OneDrive, Google Drive, Dropbox, and Xbox.
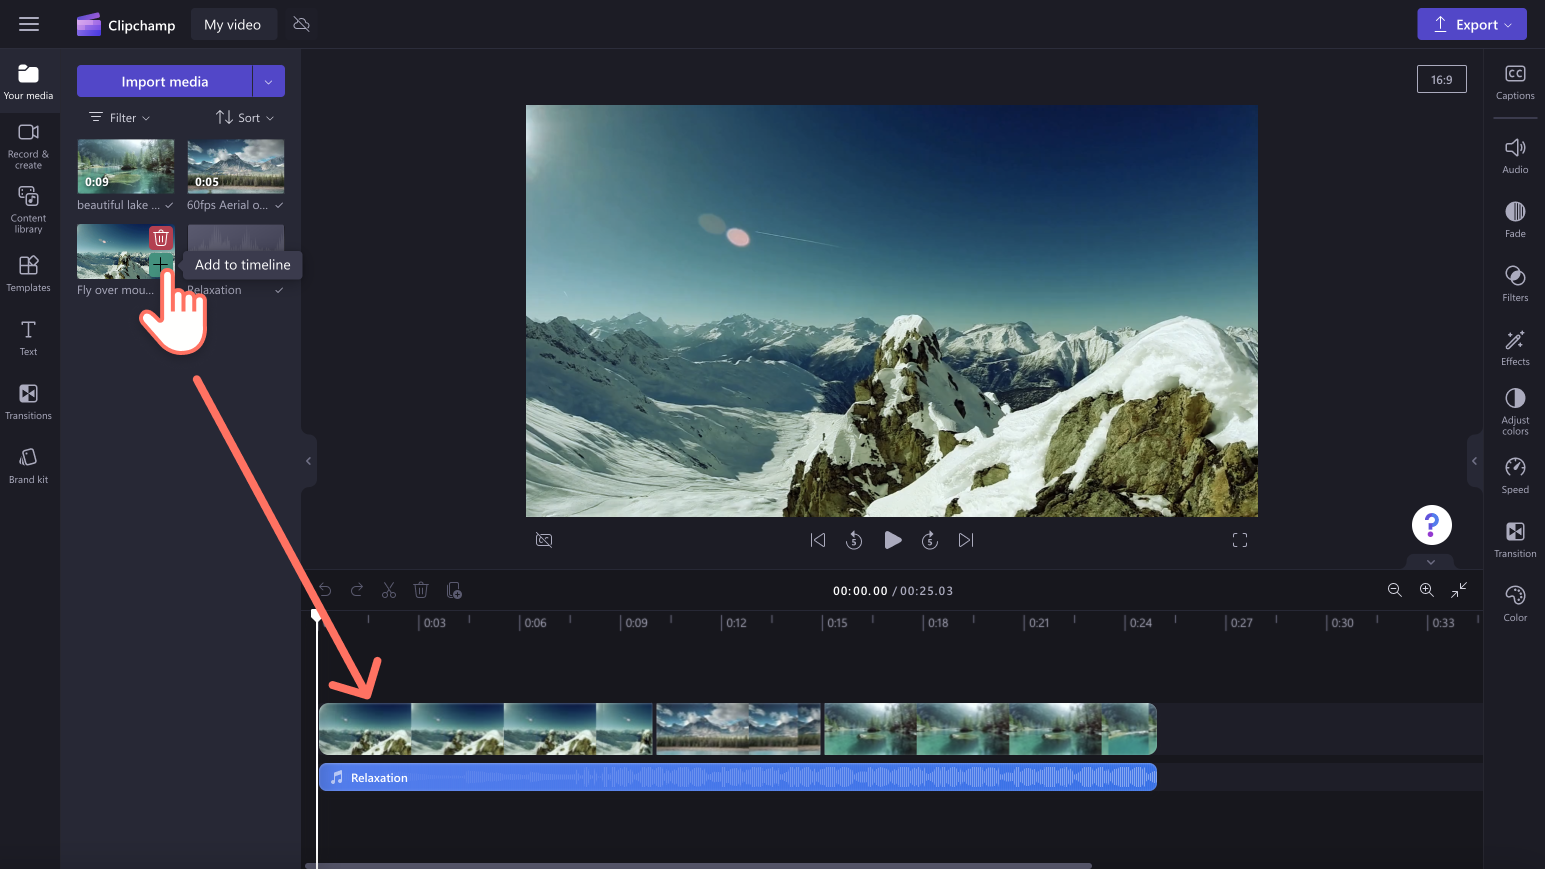
Your upload 4K video/s will appear in the your media tab on the toolbar. Drag and drop your videos onto the timeline to start editing.
Edit your video
Make your video more accessible with titles
To add text, click on the text tab on the toolbar, then scroll through our wide variety of titles. Drag and drop a title onto the timeline above your video clip. You can personalize what the text reads by clicking on the text tab on the property panel, then adding your text. You can also change the color, position, add fades and filters, and adjust colors using the tabs on the property panel.
Add transitions between video clips
To add transitions between your video clips on the timeline, click on the transitions tab on the toolbar. Drag and drop a transition onto the timeline between two clips. The transition will automatically snap into place.
Elevate your video with stock audio
Take your 4K video to the next level with the help of our endless variety of royalty-free stock audio. Select the content library tab on the toolbar, go to music, then drag and drop an audio file onto the timeline below your video clips.
Save your video in 4K resolution
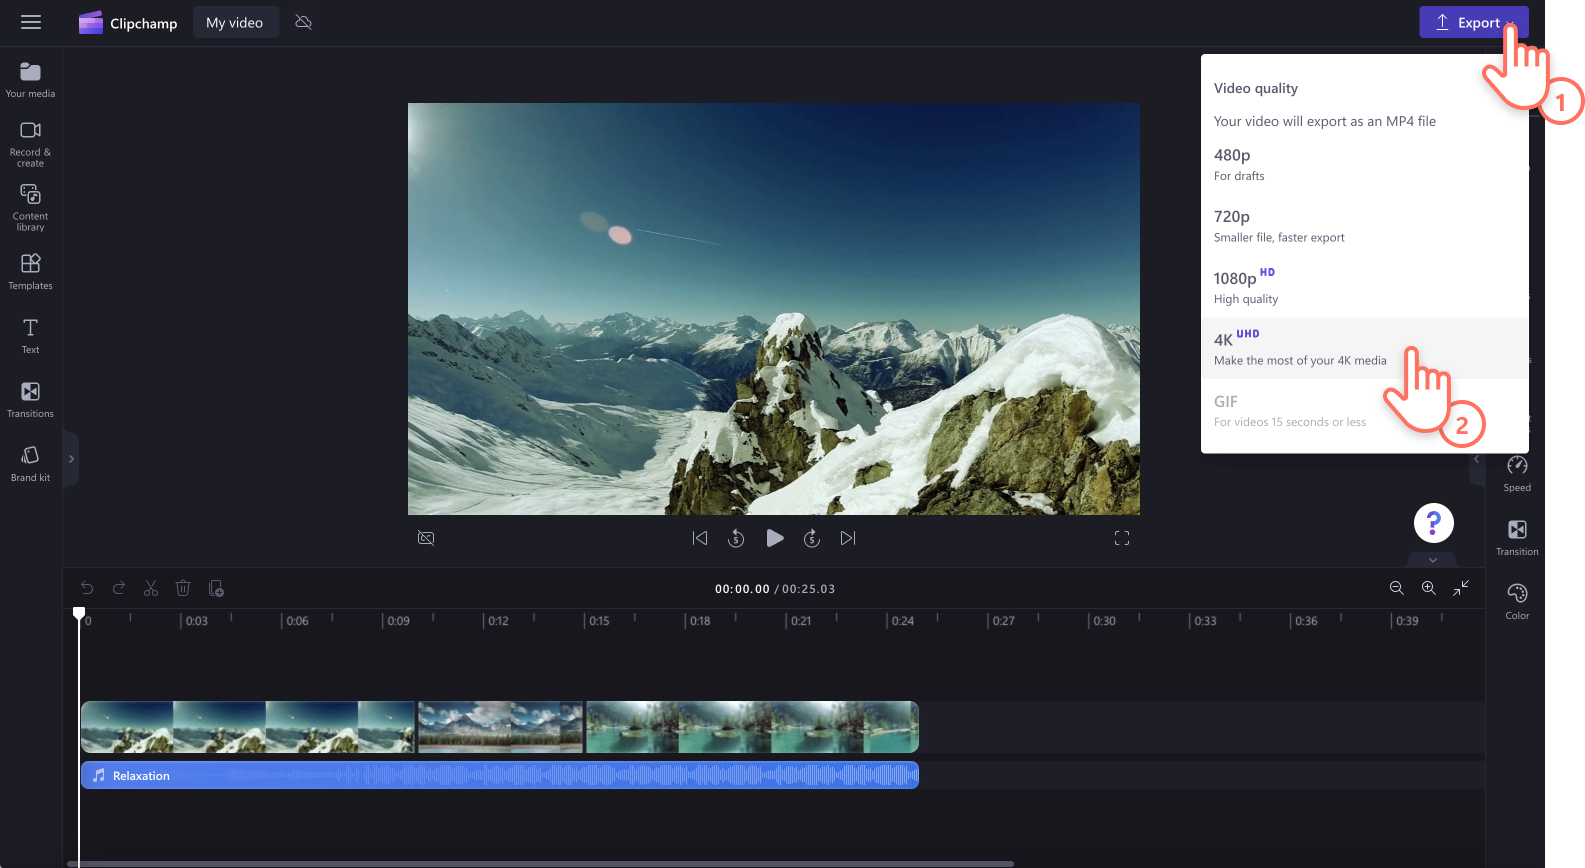
When you're ready, select the export button at the top right corner of the editor. Then, select the 4K video resolution option. This will start the exporting process.
A note regarding performance
If you are using 4K media files in a Clipchamp project but are not planning to export the project in 4K, consider compressing your input videos first and then use the resulting smaller file versions, e.g. in 1080p resolution, in your project instead.
4K videos can be substantially larger than smaller resolution files, can therefore be slow to import and can also cause performance issues while editing them in some circumstances. If you're not planning to export the video in 4K, working with smaller files can lead to a smoother experience.
Additional factors that play a role here are the length of your video(s), the amount of available memory on your computer, its graphics card and its CPU.
Learn more about input file types supported by Clipchamp.


