
Microsoft Clipchamp is a video editing application that is available for personal accounts and for work accounts. You can use it on Windows, Mac, Linux, and Chromebook.
Clipchamp for personal accounts can get accessed via its installable Windows app or by going to app.clipchamp.com in an Edge or Chrome browser window.
Watch our quick tutorial video for a demonstration of how Clipchamp works or scroll down for step-by-step instructions to help you get started using its editing features.
For the best experience
Before you start using Clipchamp, we recommend you follow these steps to make sure your browser settings are optimal for the best editing experience.
Get familiar with Clipchamp
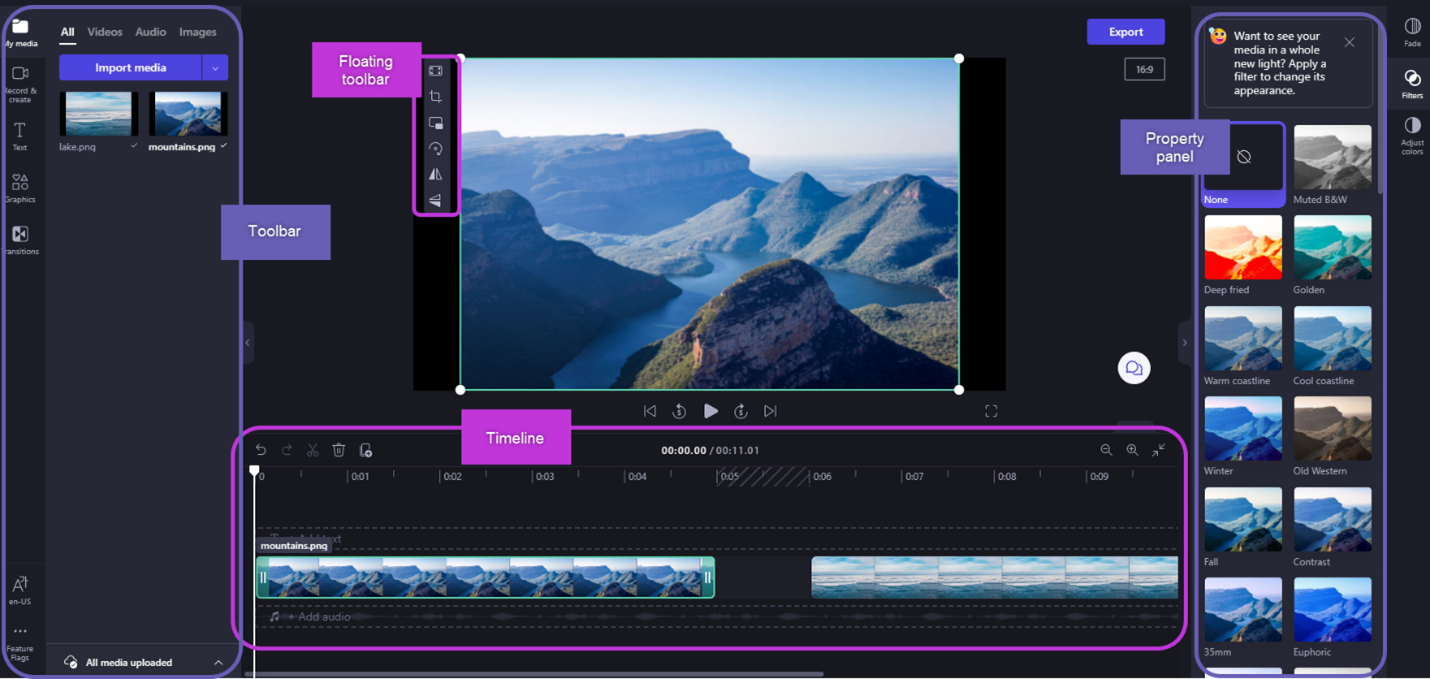
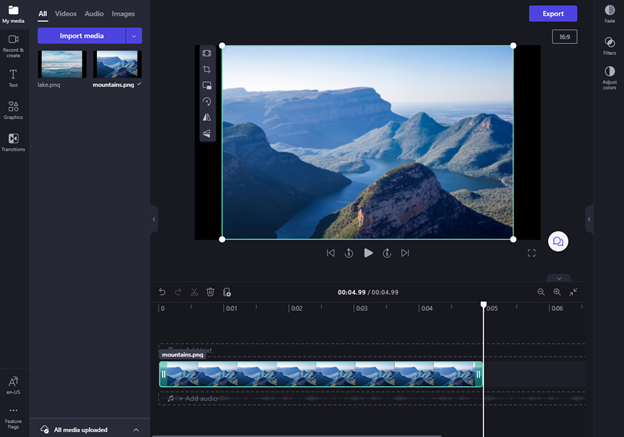
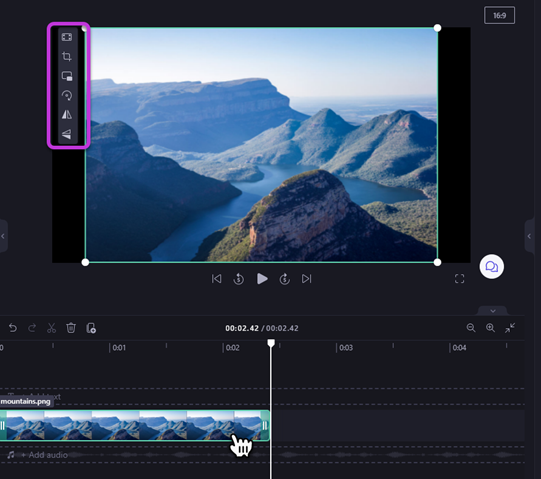
The interface in Clipchamp is beginner-friendly, helping you quickly locate all the professional editing functions including the:
-
Timeline
-
Toolbar
-
Floating toolbar
-
Editing toolbar
-
Property panel

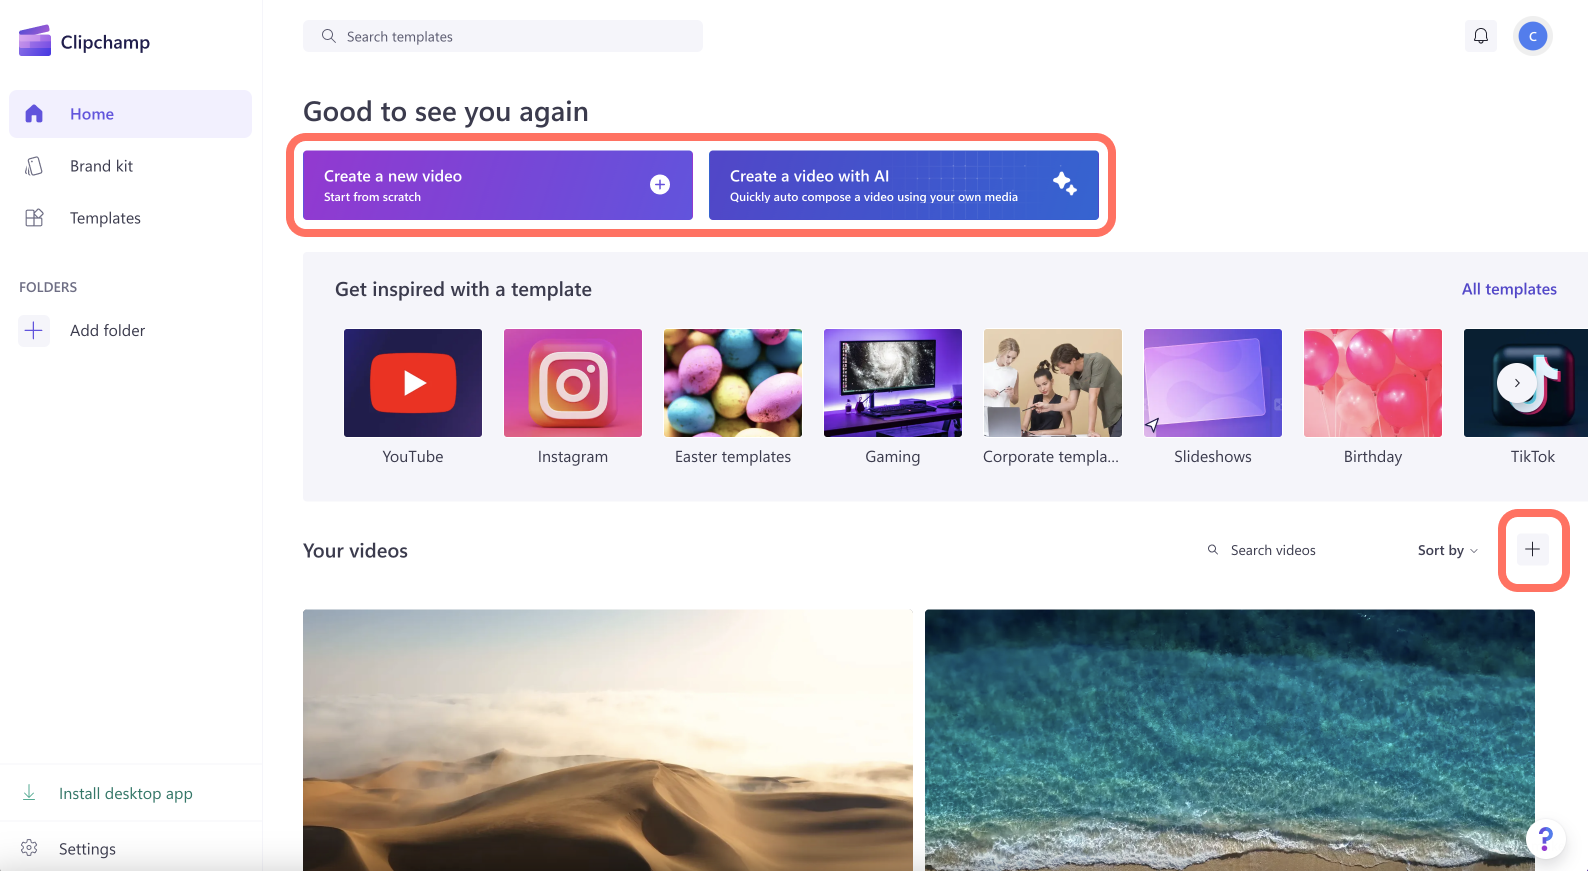
How to create a new video
A quick way to start creating a video in Clipchamp is to right-click on a media file in Windows Explorer and click on the edit with Clipchamp button, or click on the create a video option on a media file in the Windows Photos app. This will launch a new video in Clipchamp with the media file already loaded in the media library and on the timeline.
Alternatively, launch Clipchamp through one of our apps or in the browser and on the editor homepage that opens at launch.
To create a new video, click on the create a new video button. You can also create a new video using our AI video editor by clicking on the create a video with AI button. Alternatively, click on the + button to create a new video.
How to add personal videos to the your media tab
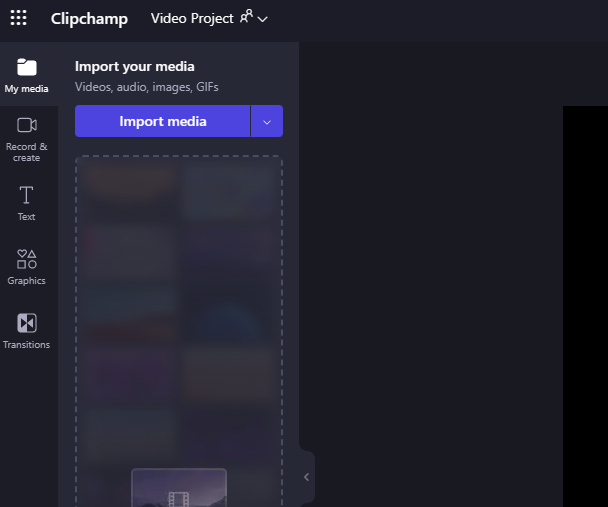
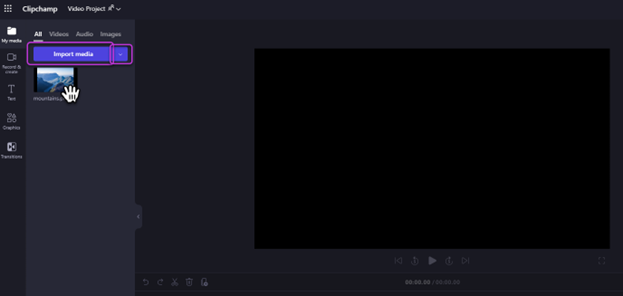
Before you can start editing, you'll need to add video files to your media library.
Import media assets using the following options:
-
Drag and drop media files from your computer into the your media tab
-
Click on the import media button to import media from your computer files
-
Click on the arrow button to import media using one of our integrations like OneDrive, Google Drive, Dropbox and Xbox.
You can add video files, images, and audio files.
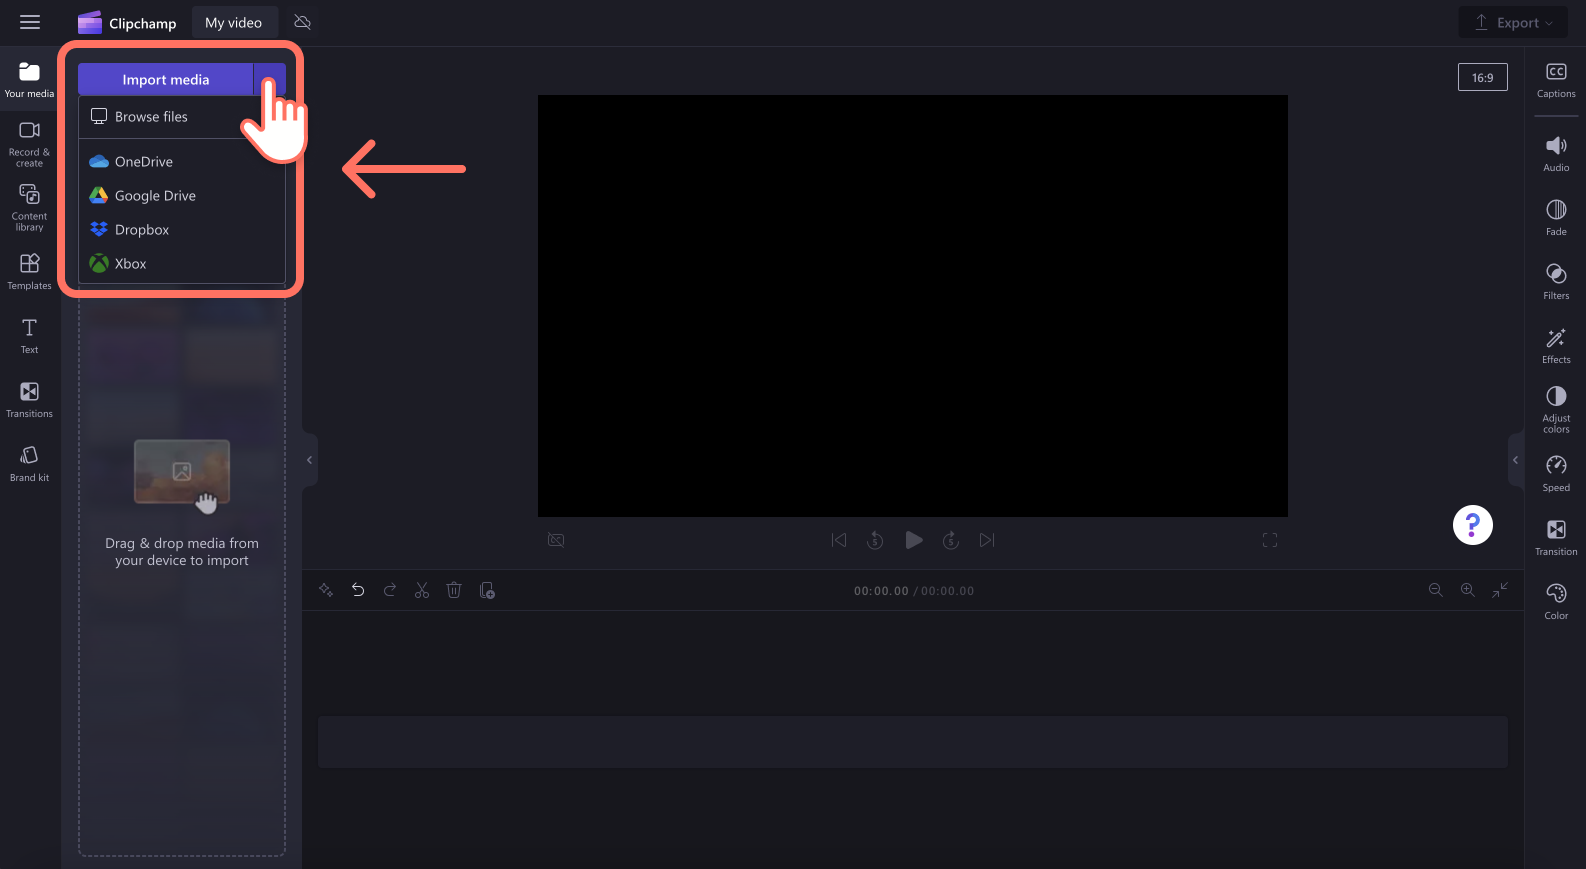
Your media assets will appear in the media tab on the toolbar.
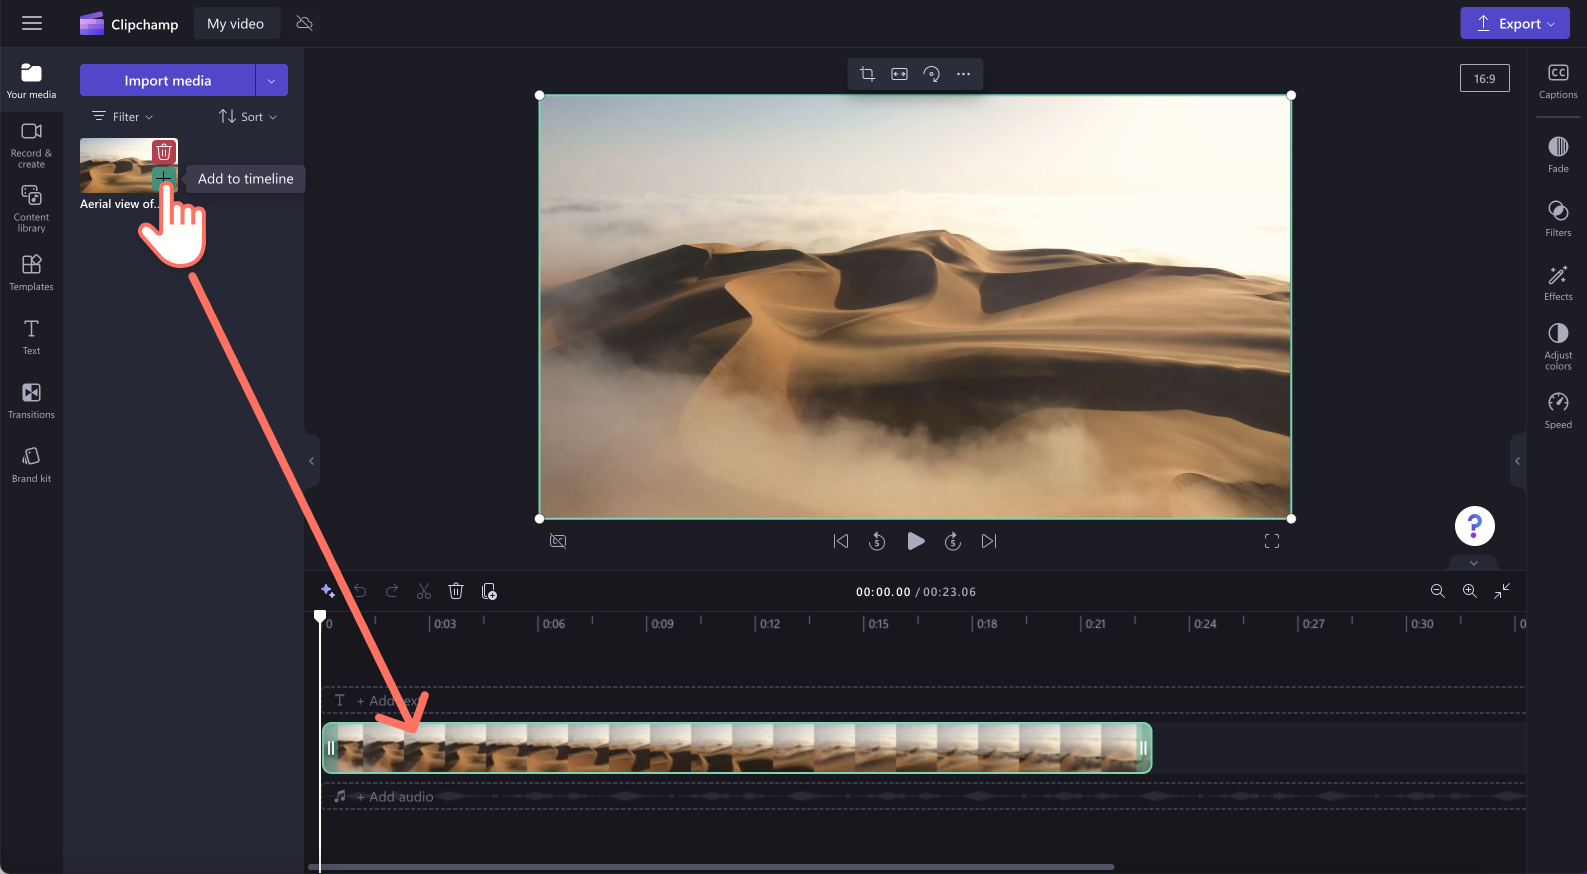
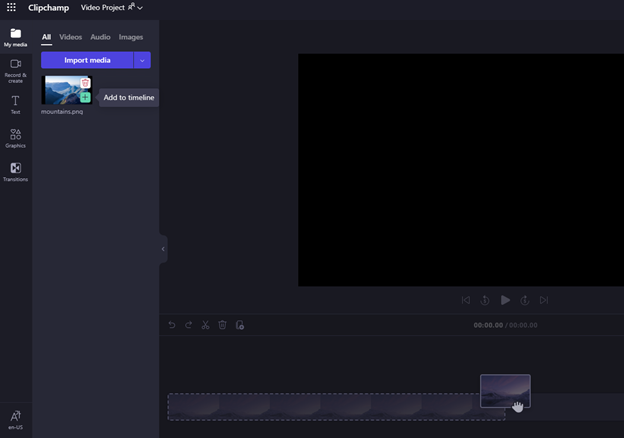
How to add videos to the timeline
Add your video to the timeline by either clicking on the green + button or dragging and dropping your video onto the timeline. If you want to add multiple assets to it, simply repeat the step or highlight all of your assets to drag and drop onto the timeline.
How to edit a video in Clipchamp
Here's a list of some of the user-friendly editing tools we currently offer.
For more detailed instructions, screenshots and tips for a particular tool, follow the links that we've listed below.
-
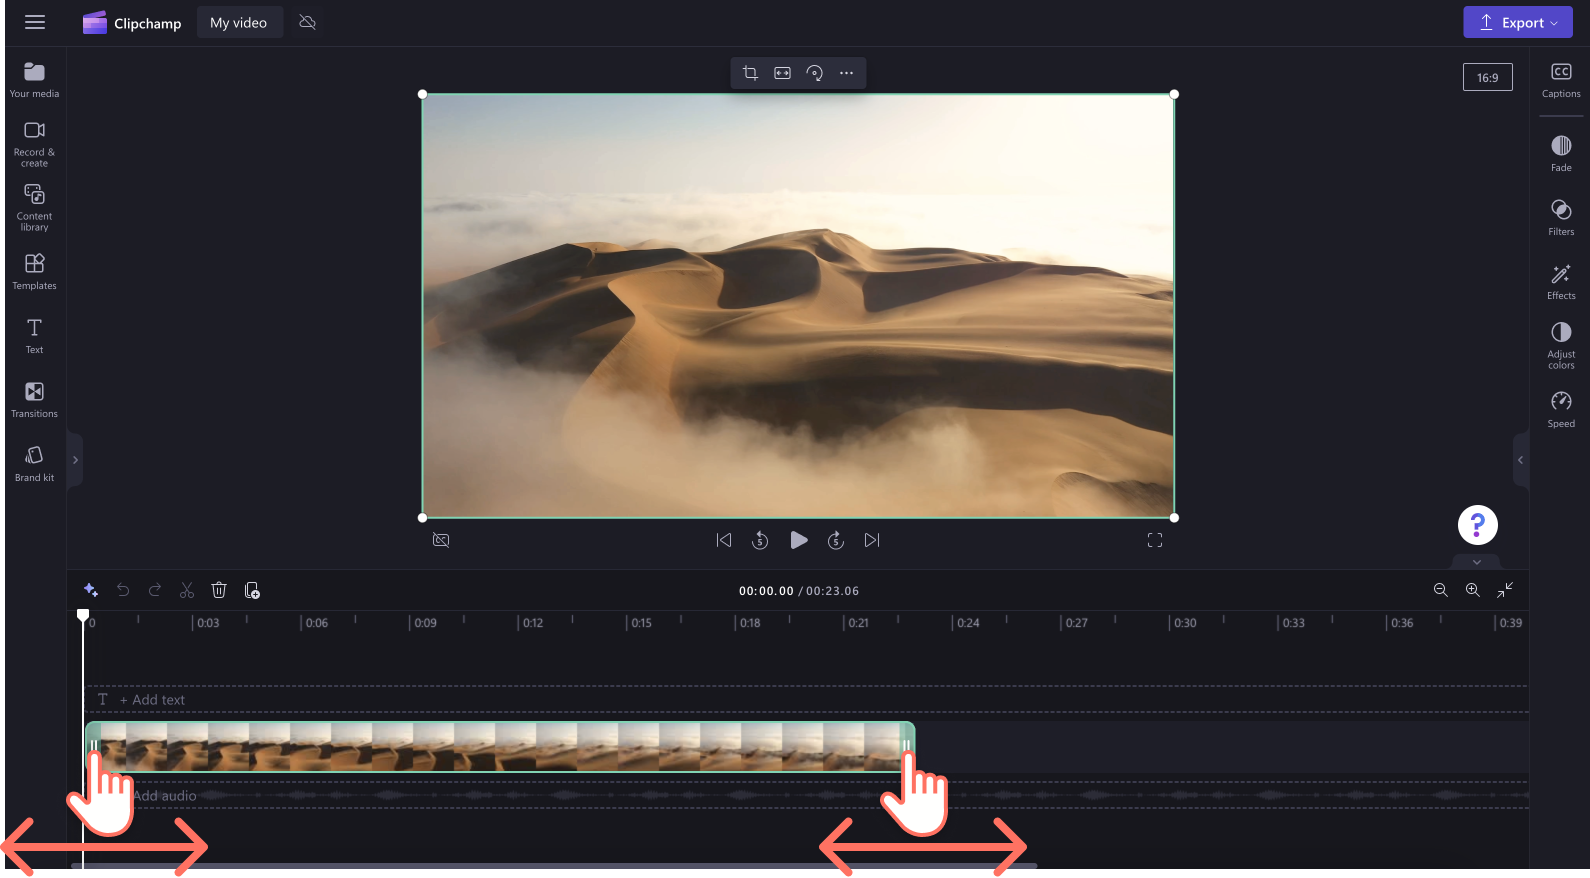
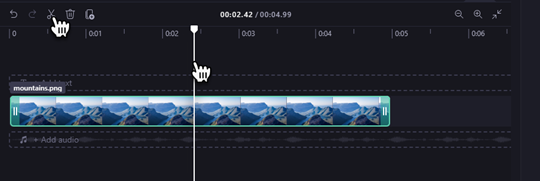
To trim an asset, click it on the timeline (i.e. click on it, so it is highlighted), then click and drag the green bars back and forth.
-
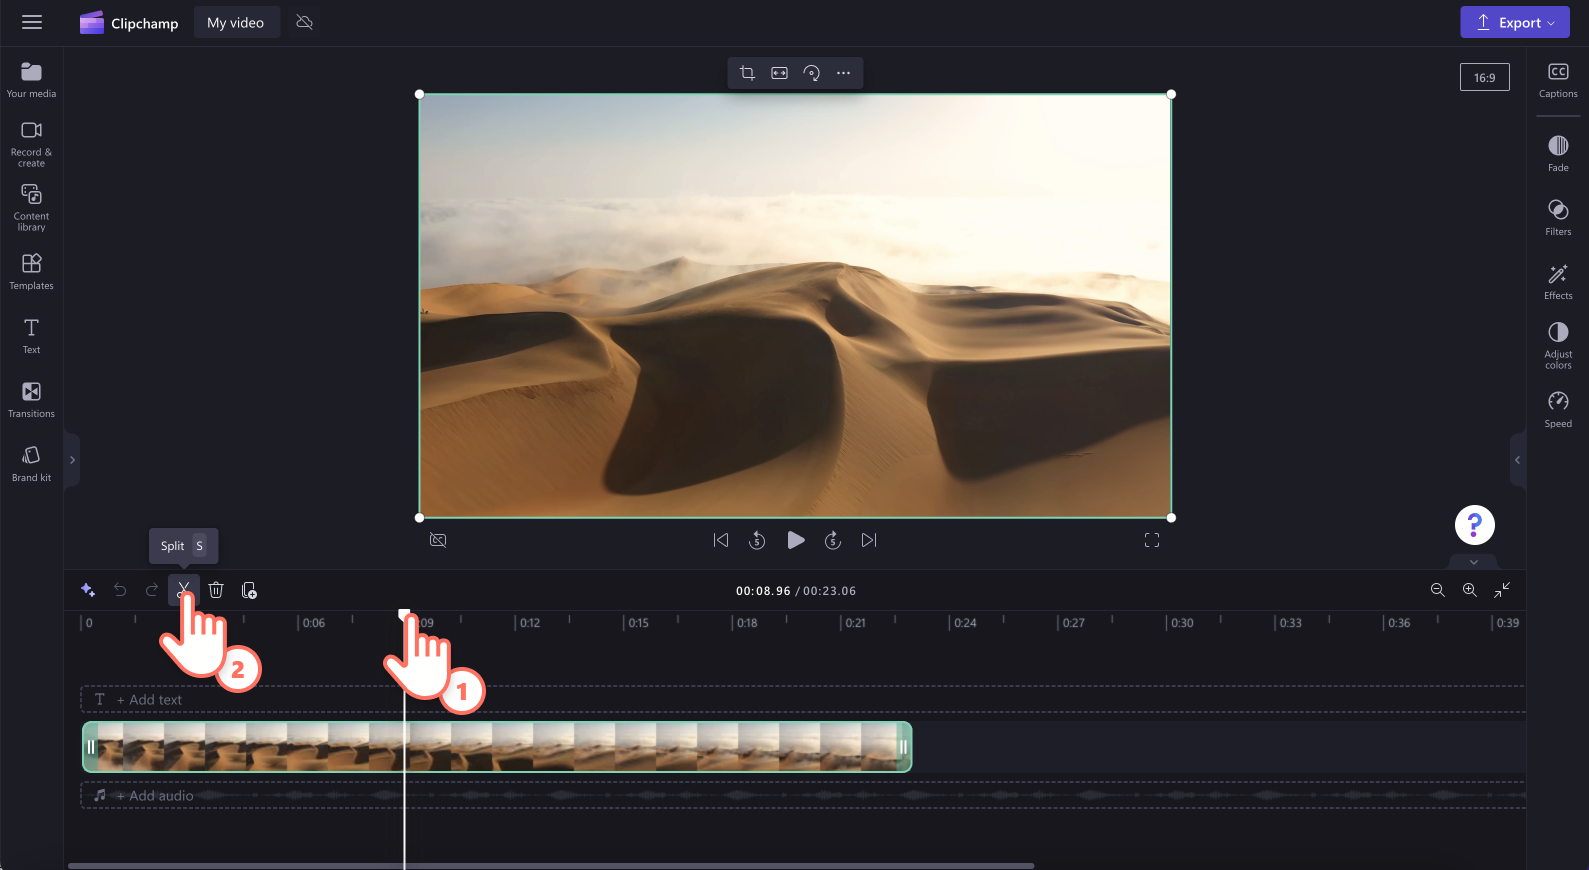
To split an asset in two, click on the clip on the timeline, then move the seeker (the white vertical line with the circle on top) so it is positioned where you want to cut the clip. Next, click the split button on the editing toolbar.
-
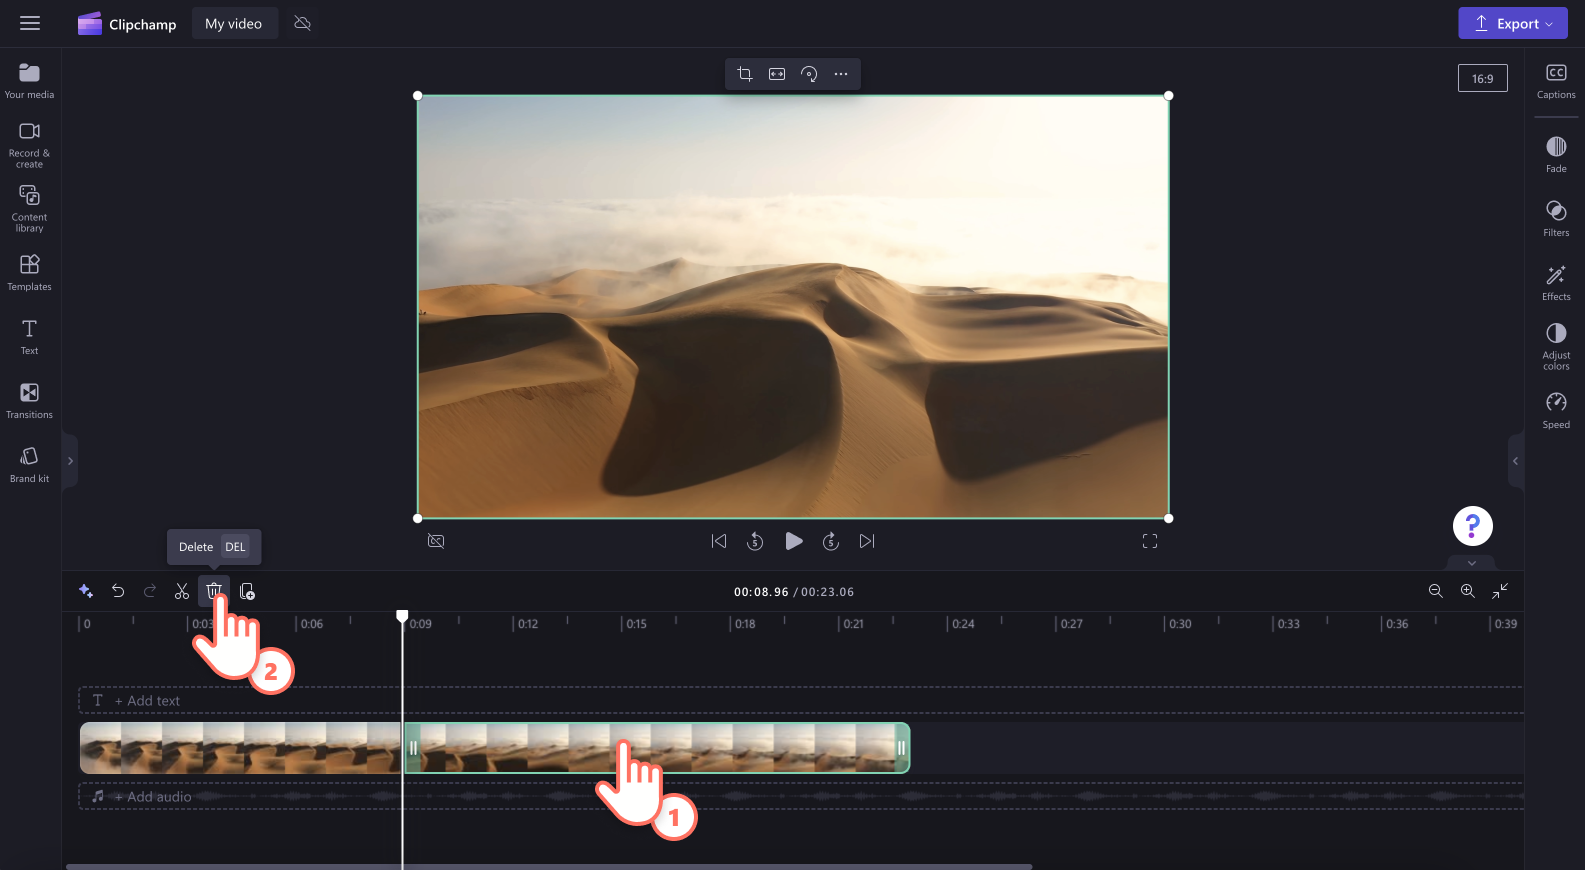
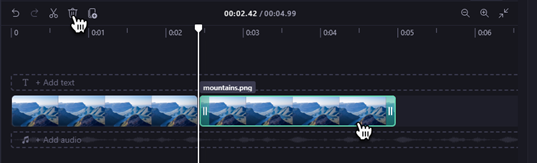
To delete media from the timeline, click on the asset on the timeline, then click the delete button (trash icon) or hit the delete key on your keyboard.
-
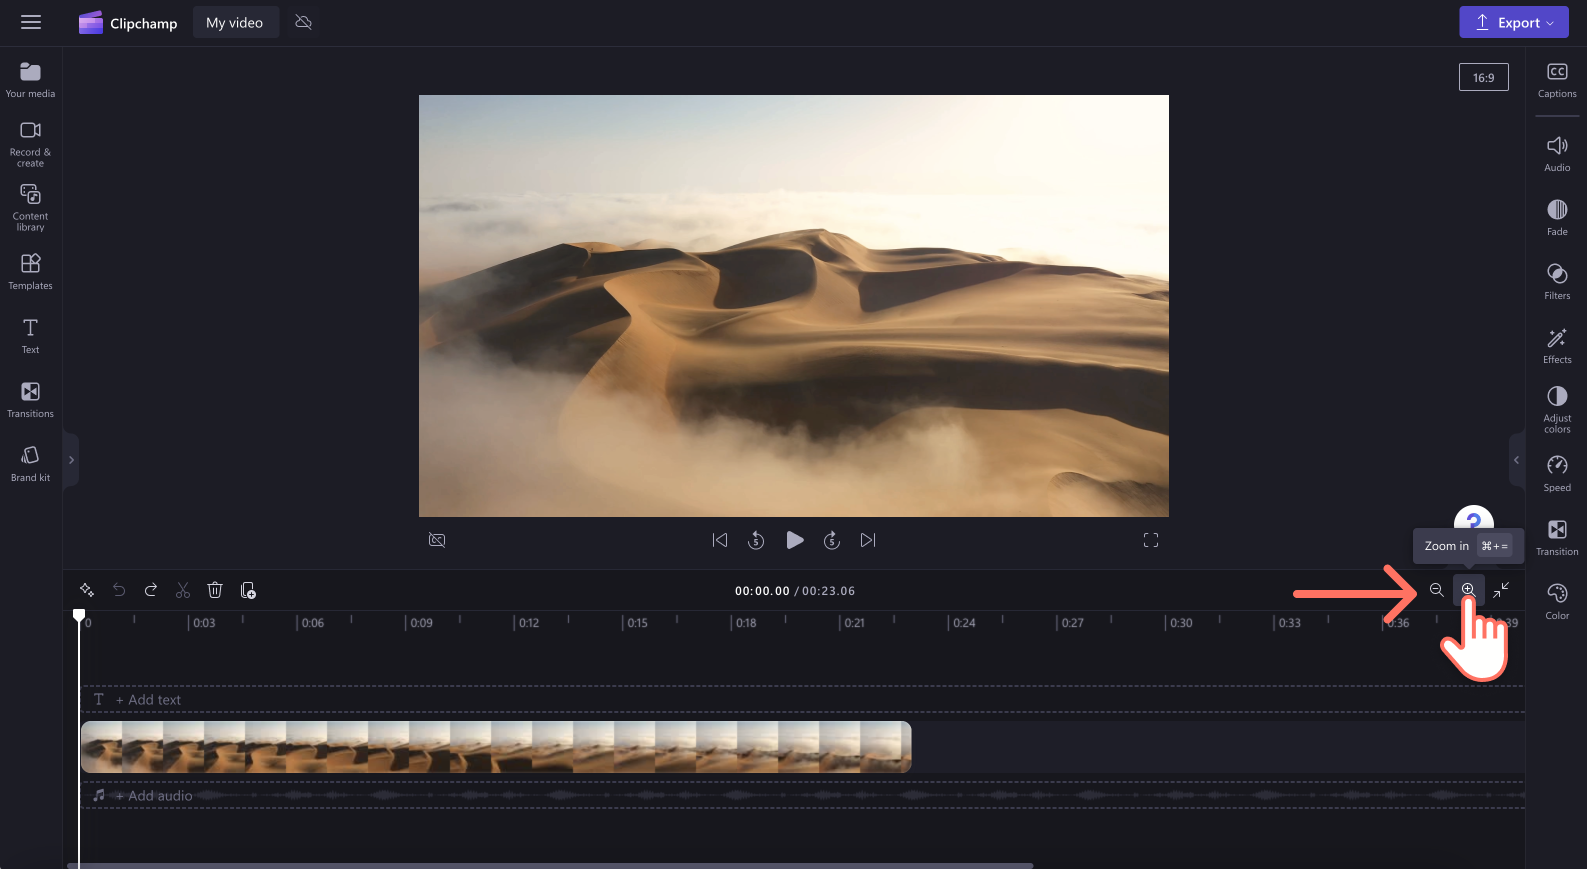
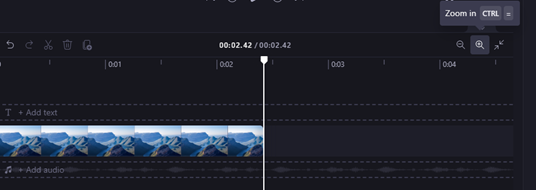
To zoom in and out of the timeline, use the zoom buttons on the editing toolbar (+ to zoom in, and – to zoom out). Alternatively, use the zoom to fit button (–><–) to fit everything that's on the timeline to the visible area.
-
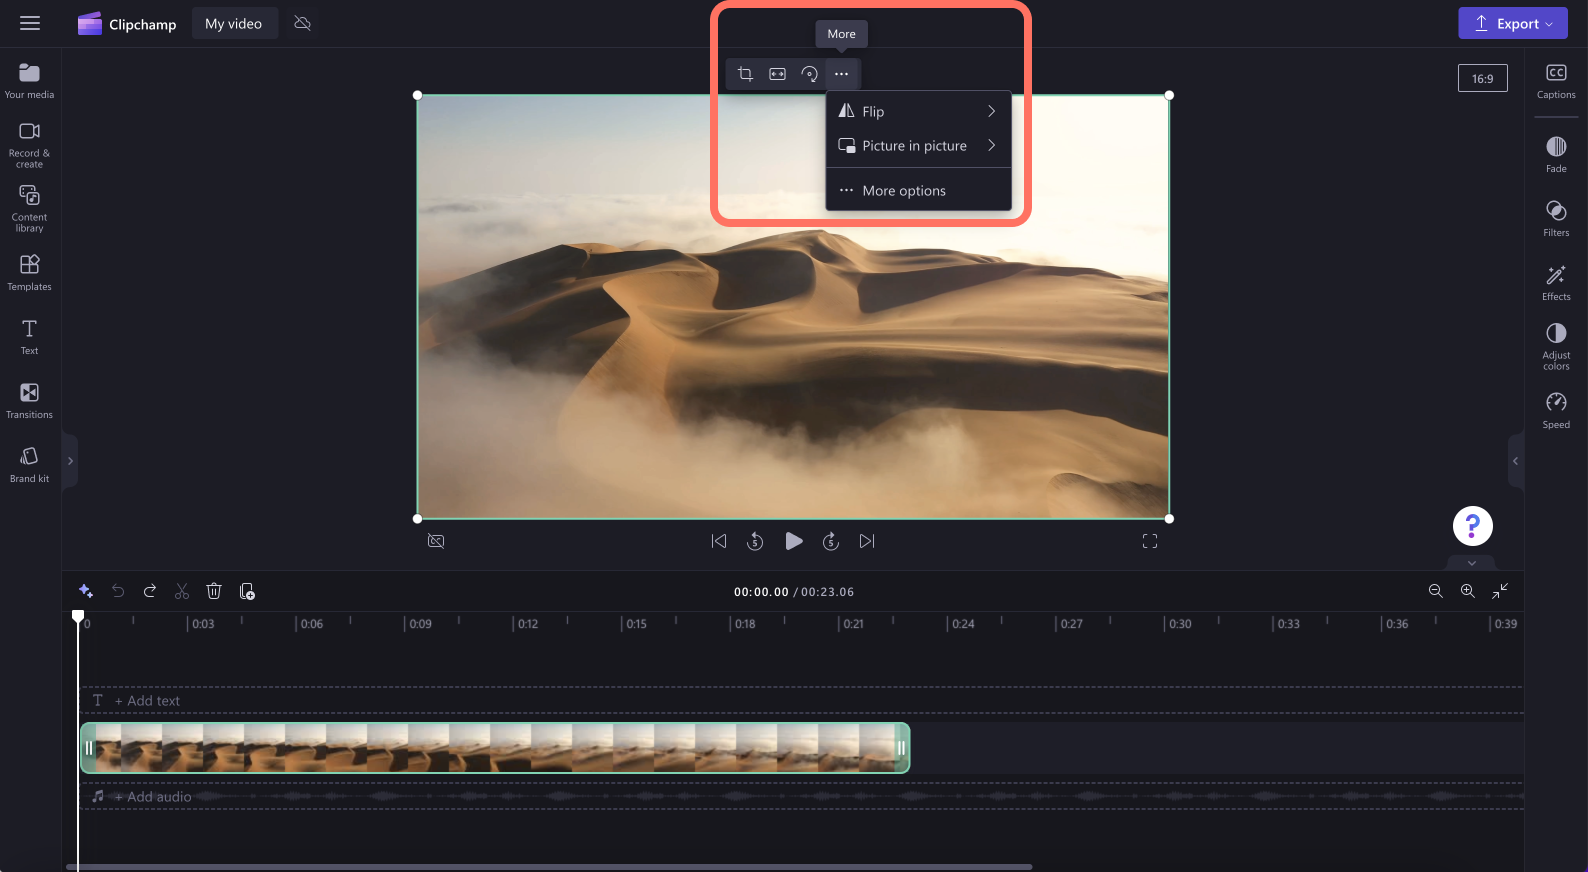
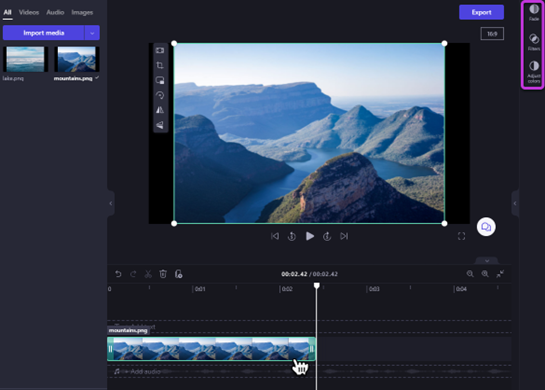
To crop, fill, rotate, flip, or achieve a picture in picture effect, use the options in the floating toolbar.
-
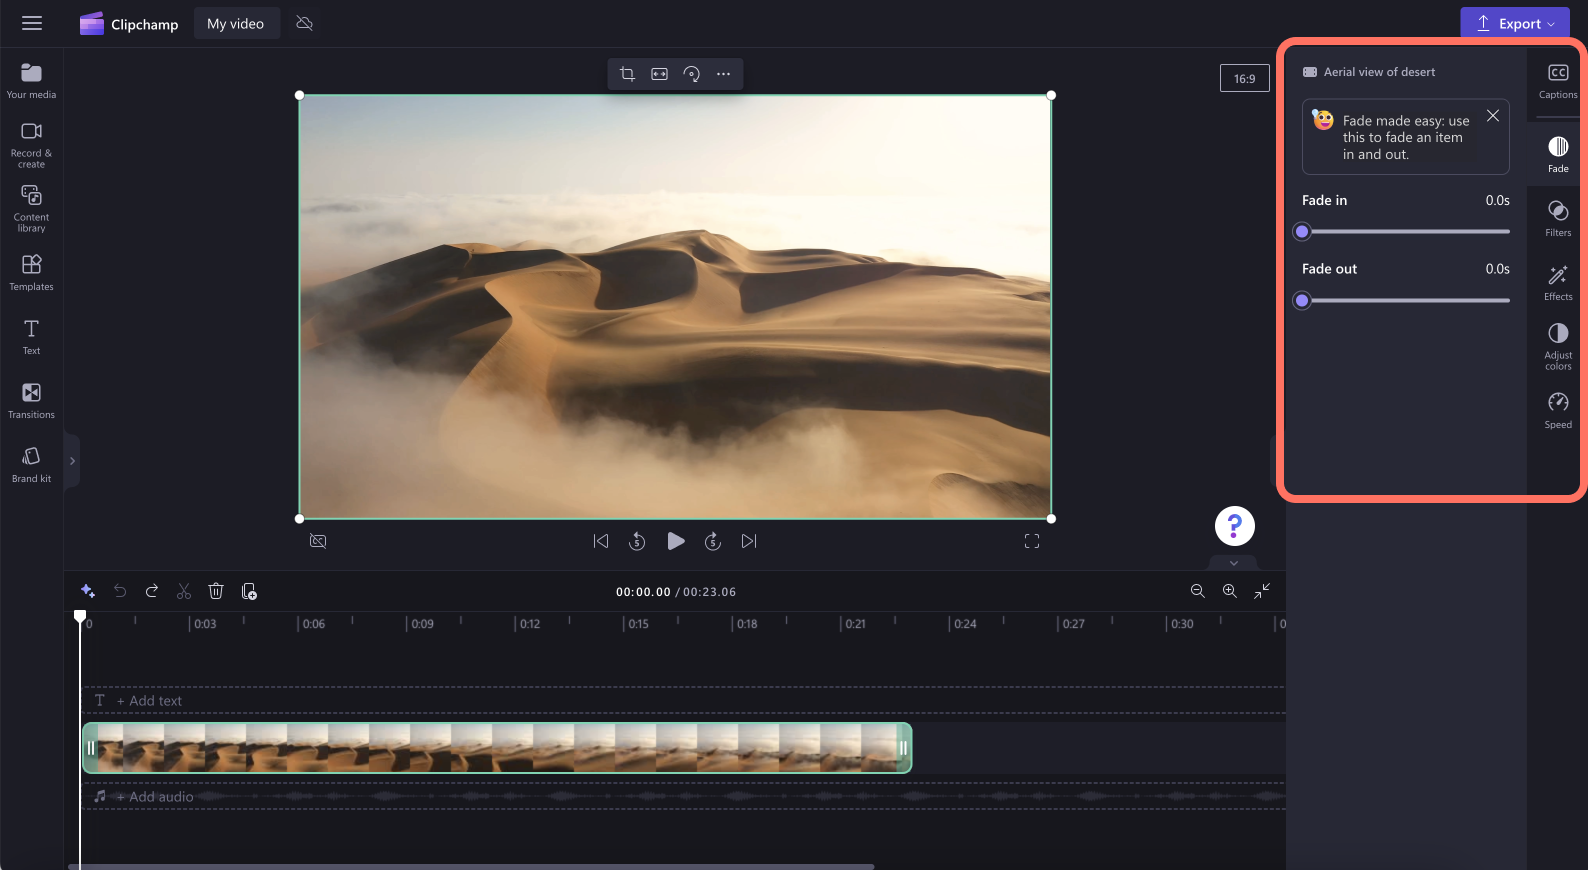
To add fades, add filters,effects, adjust colors, change the volume, or edit the speed, use the features on the property panel.
-
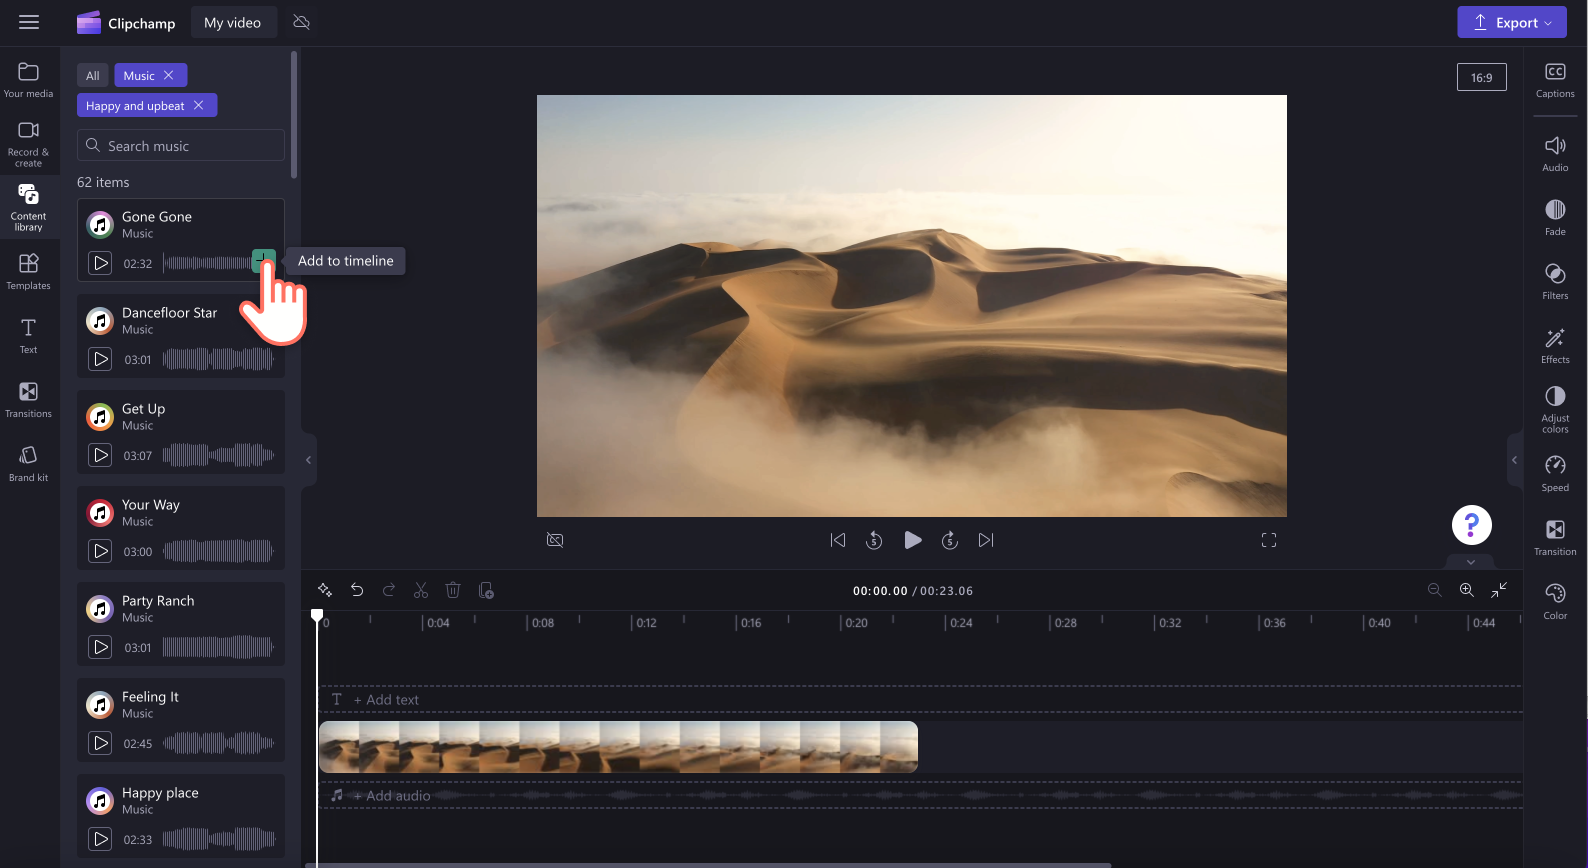
To add stock music to your video, click on the content library tab on the toolbar, then click on the audio category. Here, you can find stock music to add to your video. Drag and drop the asset onto the timeline or click on the + button.
-
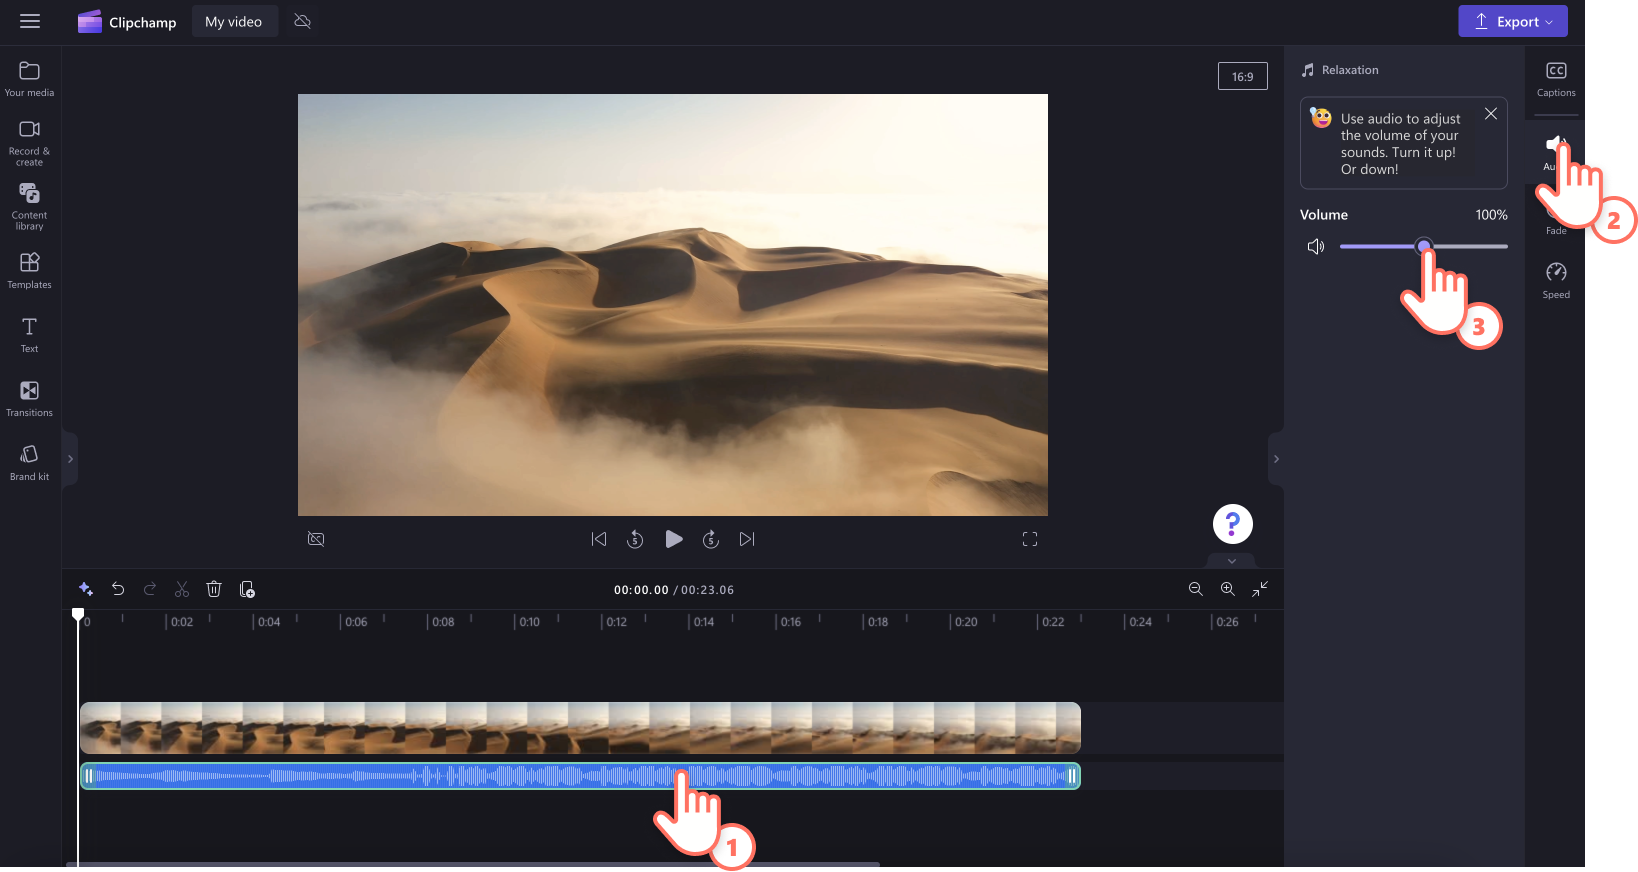
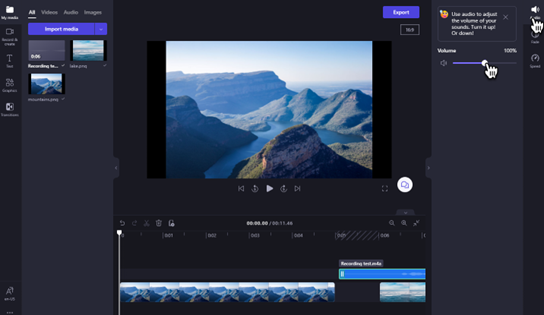
To change the audio level of your music/audio file, click on your audio in the timeline, then click on the audio tab on the property panel. Drag the volume slider to the left to turn down the volume, and right to make the volume louder.
-
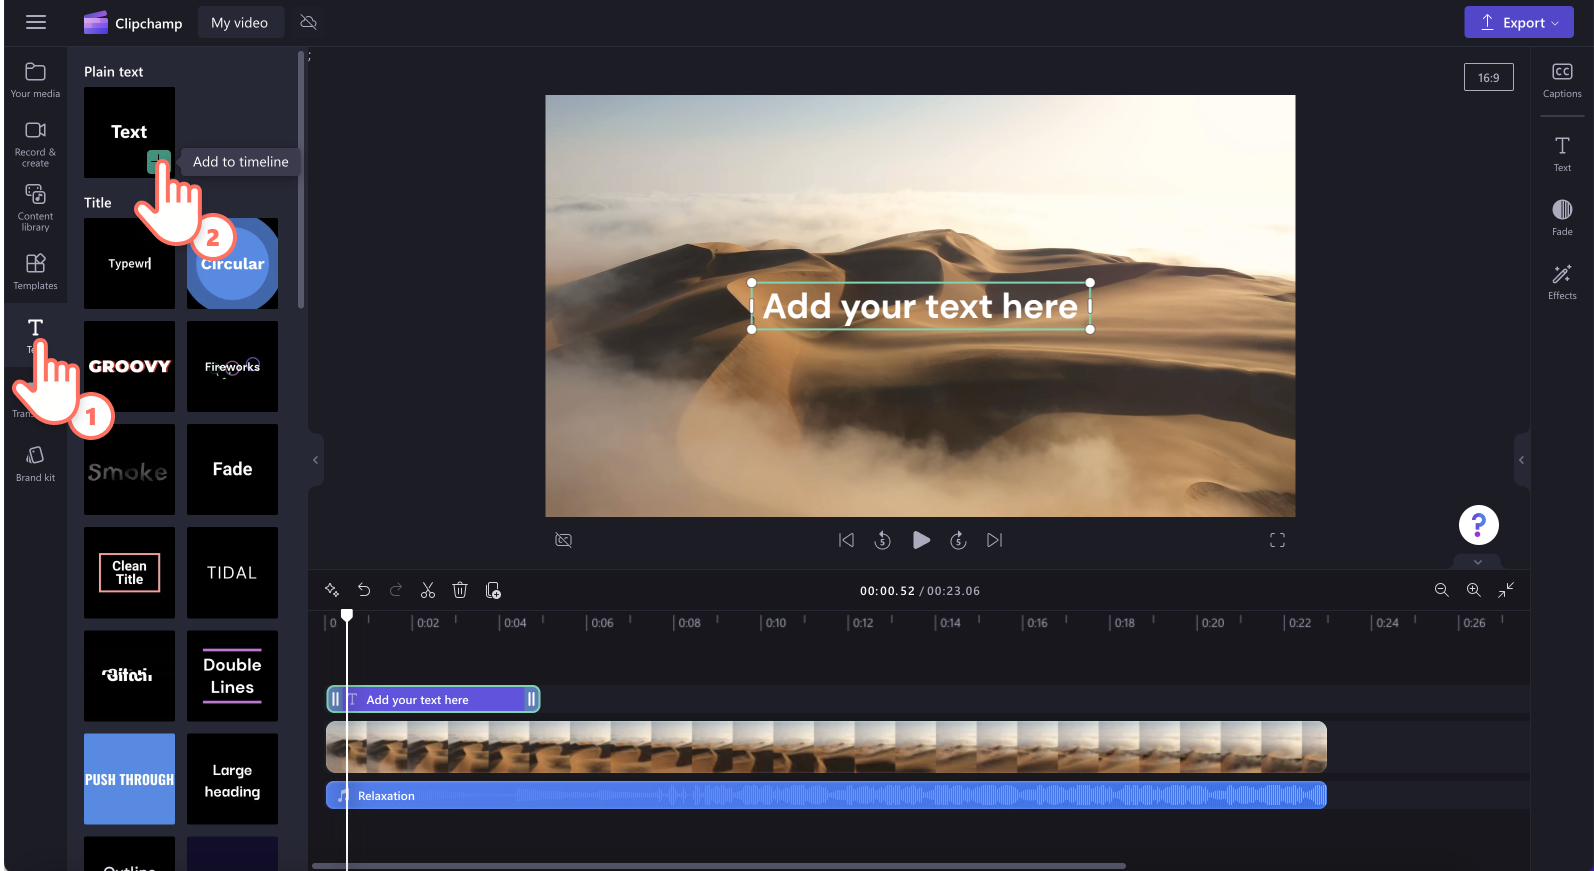
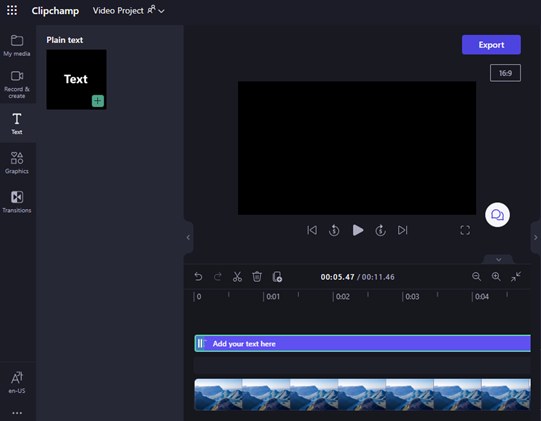
To add a title or text to your video, click on the text tab in the toolbar. Scroll through our text options to find the perfect title for your video. Drag and drop the title onto the timeline above your video asset or click on the + button to add it.
-
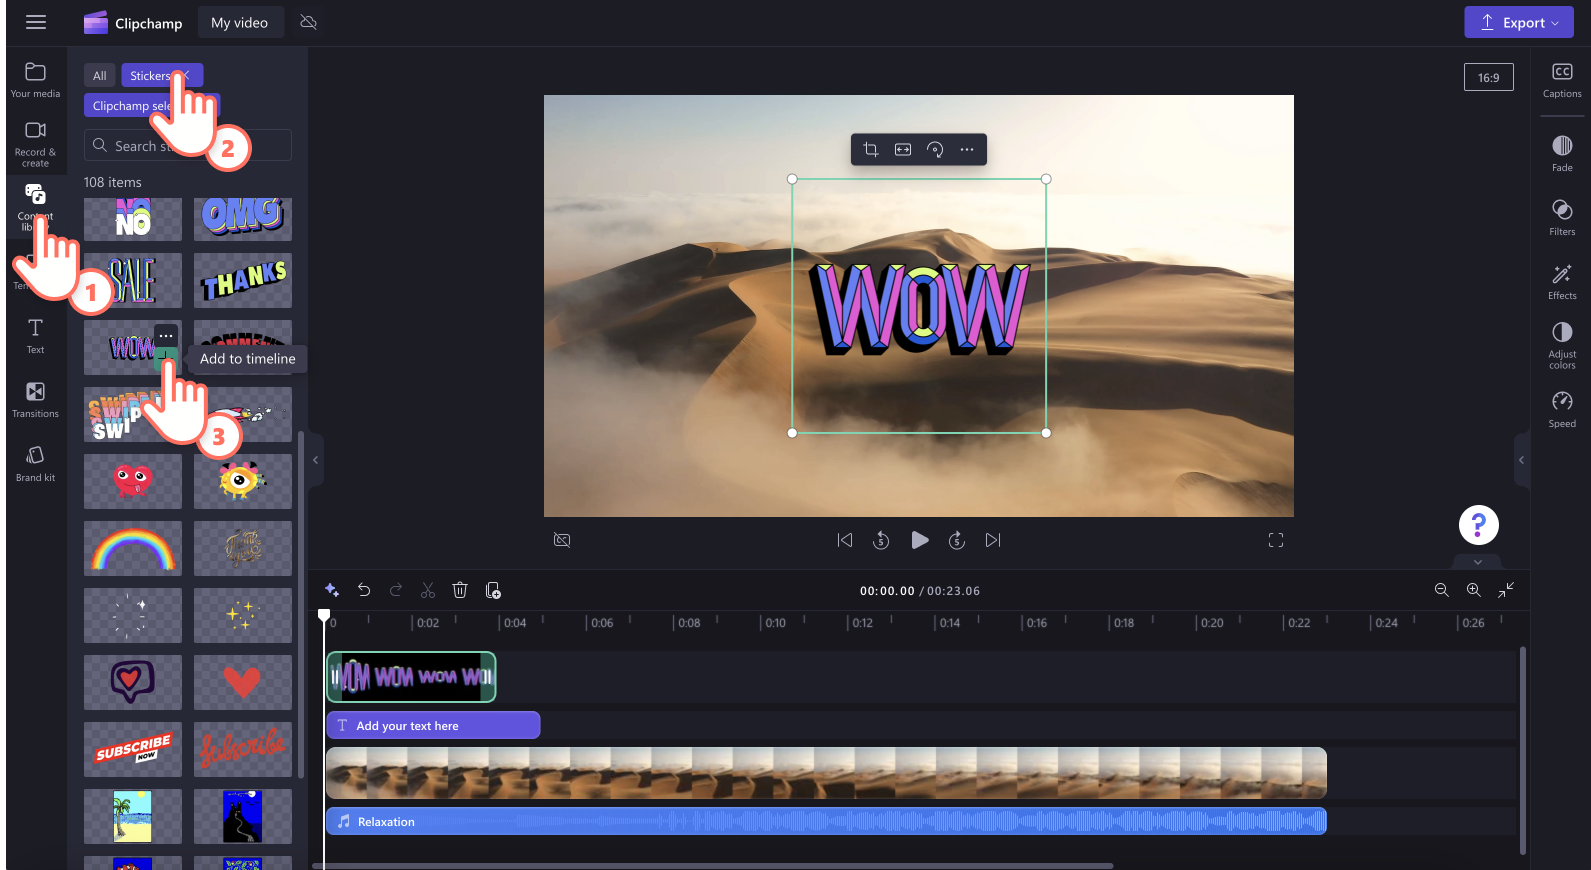
To add an overlay like stickers, backgrounds, frames, shapes, annotations, and GIFs, click on the content library tab on the toolbar. Next, click on the visuals tab then stickers. Drag and drop a sticker onto the timeline, or click on the + button.
-
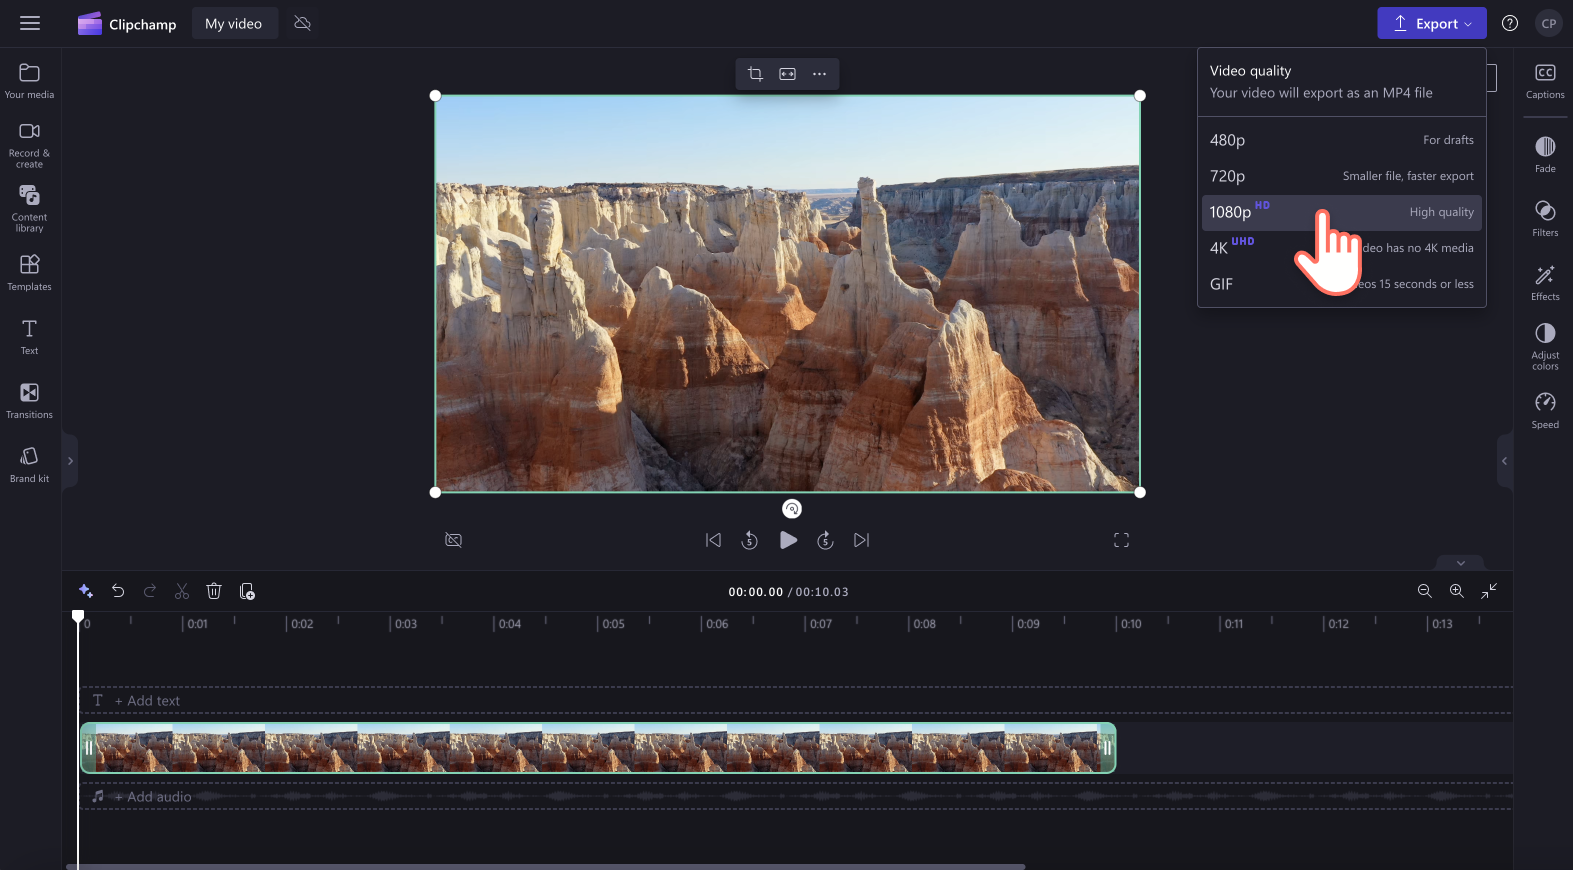
To export your video, click on the export button at the top right corner of the editor. Select a video quality to save your video. Note: Premium subscribers can export videos in 4K video resolution.
-
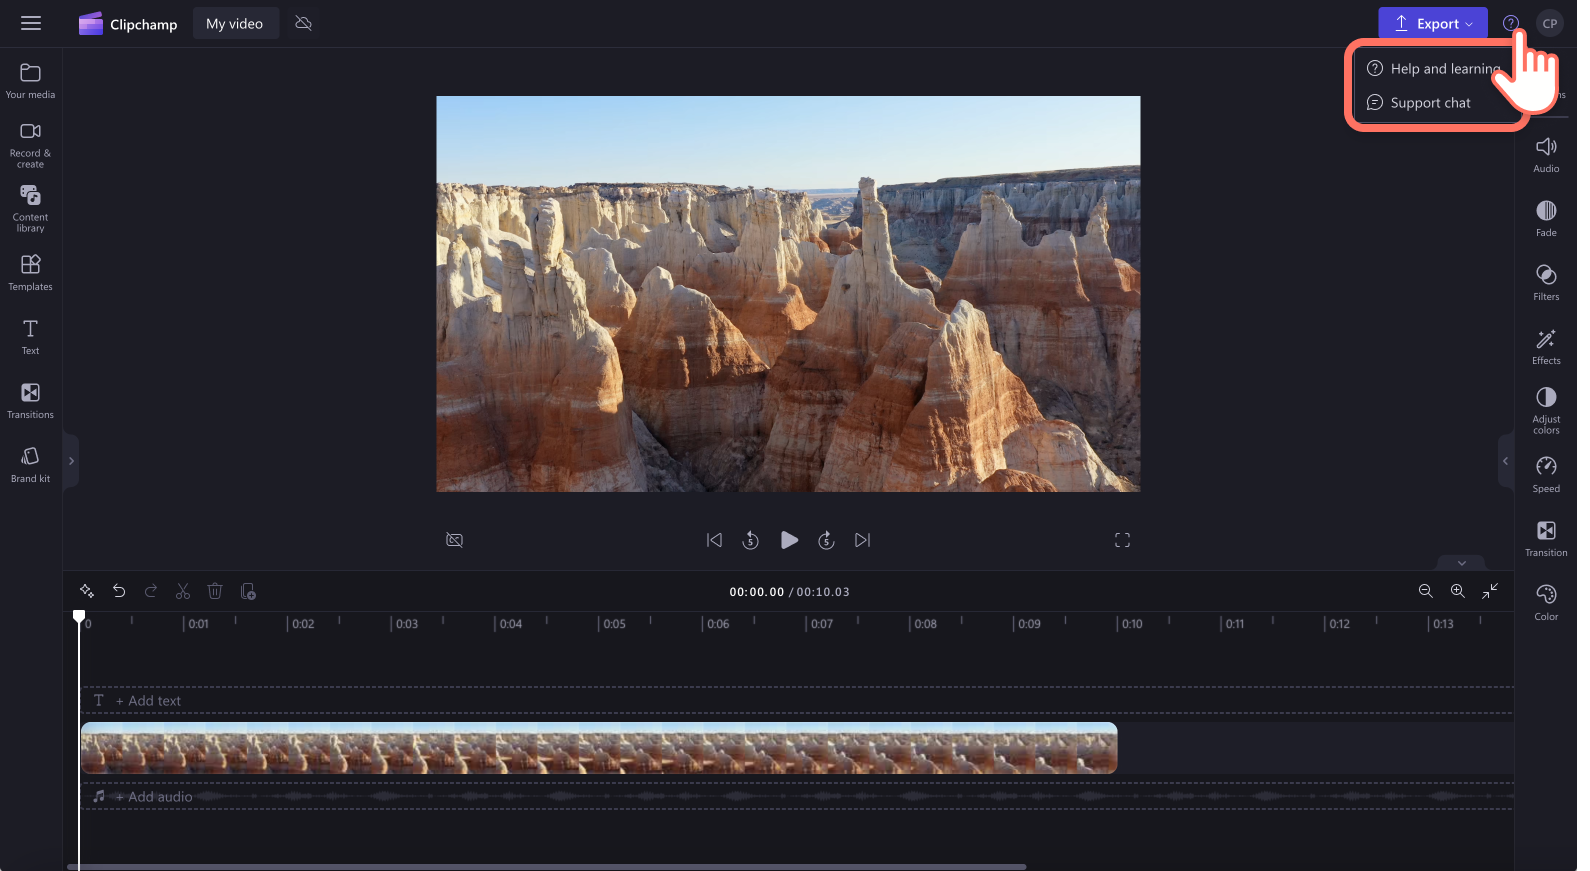
For any help, click on the question mark to locate the help and learning options, or the support chat.
-
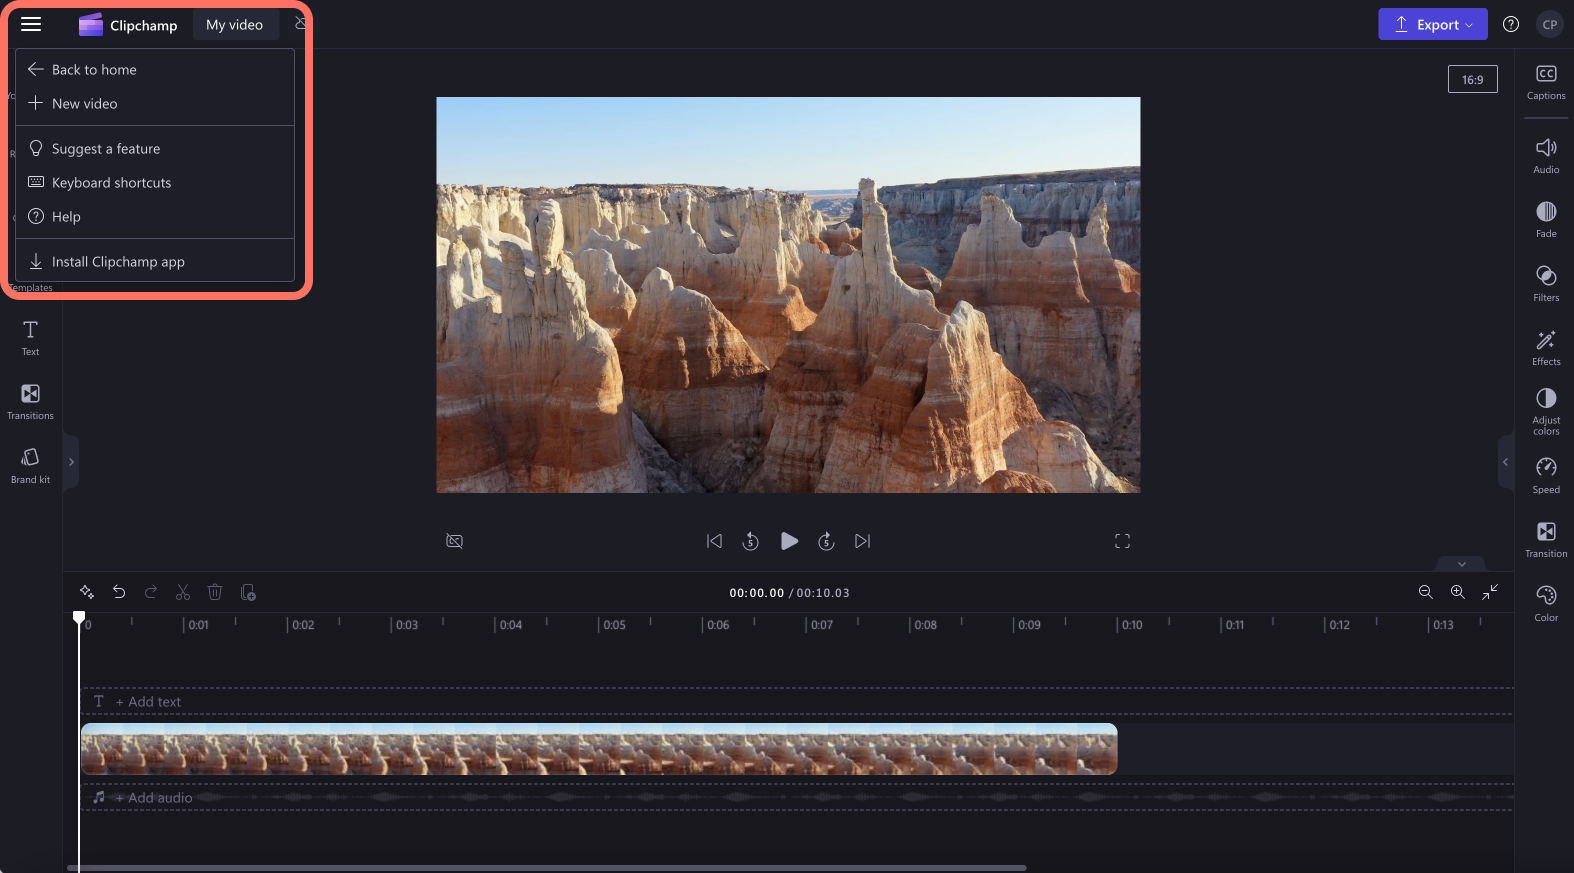
To locate the home menu, click on the horizontal three lines. Here, you can access home, a new video, suggest a feature, keyboard shortcuts, help, and install the app.
-
To reopen a video, click on a video on your homepage. The video will automatically open where you left off. Videos you edit are automatically saved while you work, so there is no need to save them before exiting.

Note: It is extremely IMPORTANT to keep your source video, image, and audio files – i.e. the original files you added on your device or enable the content backup feature in that video. Clipchamp doesn't upload your videos to a server for processing. Instead, it processes them locally on your computer. To achieve this, it is making use of modern technologies that allow it to run a bit like a hybrid between an online and a desktop application.
This unique technology makes Clipchamp fast and private. However, from time to time, you may be asked to relink your files – so, don't delete the originals!
Enabling content backup has several benefits, which include:
-
No danger of losing your files/projects. If the original media files on your computer are lost, edited, or deleted, you'll still be able to access and work with your videos if you have content backup enabled.
-
No relinking. When working with Clipchamp projects where the content backup is turned off, you will sometimes be asked to relink your original media files from your computer. With backed-up media files, you never have to worry about relinking.
-
Access videos you're editing from any computer. Instead of having to manually move your media files and relink them on a new computer, you'll be able to log in to your Clipchamp account on any computer and keep editing straight away.
Start using Clipchamp
Go to Clipchamp online video editor to start working on a new video.

You can use Clipchamp for work accounts if it is enabled in your Microsoft 365 organization. For more information, see this FAQ.
Scroll down for step-by-step instructions to help you get started using its editing features.
Not all features found in Clipchamp for personal accounts are yet launched for those accessing Clipchamp with a work account, however we're continuously working on updates.
For the best experience
Before you start using Clipchamp, we recommend you follow these steps to make sure your browser settings are optimal for the best editing experience.
Get familiar with Clipchamp’s editing functions
Clipchamp’s beginner-friendly interface helps you quickly locate all the professional editing functions, including the stage, timeline, sidebars, and the floating sidebar.
Getting started
As a prerequisite, your Microsoft 365 administrator needs to have enabled Clipchamp in your organization. When that is the case, Clipchamp can get accessed via several entry points*.
Some are available now; others will get added over time.
-
Microsoft 365 App Launcher,
-
Clipchamp start page in Microsoft 365 for the web (click Blank video to start a new editing project),
-
On the web within OneDrive and SharePoint by clicking New, then selecting Clipchamp video.
-
In the Clipchamp desktop app for Windows from app version 3.x.
*Make sure you're logged in with your Microsoft work account.
In OneDrive and SharePoint, you can also start a Clipchamp project using an existing video by navigating to the file in My files, right-clicking it and selecting Open > Edit in Clipchamp.
Another possibility is to open a video file in Stream, then selecting the Clipchamp menu item at the top. This will launch a new editing project with the media file getting loaded into the media library and onto the timeline of the project. You need to have the appropriate access rights for the video in Stream to see the Clipchamp option.
After starting a project, the video editor interface will launch. Now you can import files by going to My media, selecting Import media or dragging and dropping files in the left pane. You can also select Record & create.
How to add videos to your media library
Before you can start editing your videos, you'll need to add the video files to your media library.
Available options are to
-
drag and drop media files from your device,
-
select Import media, or
-
select the arrow button to import media using one of the available integrations like OneDrive.
You can add video files, images, and audio files.
How to add videos to the timeline
To edit your video, drag and drop media onto the timeline at the bottom of the editor. You can also select the + (plus symbol) to add media directly to the timeline.
Your timeline should look like this.
If you want to add multiple assets to it, simply repeat the above step. Drag and drop media assets like video, images, audio, and graphics onto the timeline.
How to edit in Clipchamp
Here's a list of some of the user-friendly editing tools we offer.
For more detailed instructions, screenshots and tips for a particular tool, follow the links that we've listed below.
-
To trim an asset, select it (so it’s highlighted), then select and drag the green bars back and forth.

-
To split an asset in two, select the clip, then move the scrubber (the white vertical line with the circle on top) so it’s positioned where you want to cut the clip, then select the scissor icon in the group of icons.
-
To delete media from the timeline of your project, select the asset and then select the trash icon (or press the delete key on your keyboard).
-
To zoom in and out of the timeline, use the buttons in the top right-hand corner: (+ to zoom in and – to zoom out). Alternatively, use the fit to screen button (–><–) to fit everything that's on the timeline to the visible area.
-
To fill, crop, create a picture in a picture, rotate, flip horizontal or flip vertical, select the clip (so it’s highlighted) and select from the options in the floating toolbar.
-
To add fades, add filters, adjust colors, change the volume, or edit the speed, use the tabs on the right property panel.
-
To change the audio level of your music/audio file, select your file, then select Audio on the right property panel. Drag the volume slider to the left to turn down the volume, and to the right to make the volume louder.
-
To add a title (text) to your video, select Text in the toolbar. Drag and drop the text field onto the timeline above your video asset or select the + button to add it.
-
To add backgrounds, select Graphics on the left toolbar. Drag and drop a background onto the timeline.
-
To export your video, select the purple Export button at the top right corner of the editor. Select a video quality to save your video.
-
To reopen a video, select your project on the homepage. The video will automatically open where you left off. Videos you edit are automatically saved while you work, so there is no need to save them before exiting.
Note that it is IMPORTANT to keep your source video, image, and audio files – i.e. the original files you added.
Why? Because Clipchamp doesn't upload your videos to a server for processing. Instead, it processes them locally on your computer. To achieve this, it is making use of modern technologies that allow it to run a bit like a hybrid between an online and a desktop application.
This unique technology makes Clipchamp fast and private. However, you’ll need to make sure the files aren’t removed from the Assets folder of the project in your OneDrive or SharePoint. Otherwise, you may be asked to relink your files – so, don't delete the originals!


