
Spice up your videos by adding transitions with Clipchamp. Simply add your video to the editing timeline, select the Transitions tab on the left sidebar, then drag a transition onto the timeline between two clips.
You can also add a fade-in or fade-out effect to a video, audio, or image by using the Fade In/Out tab on the righthand side of the editor.
Note: The screenshots in this article are from Clipchamp's personal version. In Clipchamp for work accounts, the same transitions and fade options are available except for a small number of premium transitions, which will get added to the work version at a later date. Using transitions and fades works the same way in both versions of Clipchamp.
Read the following sections to find out more.
How transitions work in Clipchamp
When you add a transition between two video clips in Clipchamp, it makes the video clips overlap with each other. This is why adding a transition to your video clips can affect the length of the clips or their position in the timeline. For example, a two second transition will shorten the overall timeline because two seconds from each clip will be overlapped. This is necessary to achieve transitions like cross-fade.
Since a transition is applied to the overlapping section, adding a transition may cause the video to extend in order to connect to the next clip. If you've trimmed your video clips, this may start to show parts of the video that you had trimmed away. To fix this, consider trimming or extending the video clips' duration afterplacing the transition in the timeline.
Adding a transition can sometimes cause video assets to move out of sync in the timeline. This is because the transition itself takes up space in the timeline and can affect the timing of the clips it's attached to. You can adjust the duration of the transition to be longer or shorter to suit your video needs.
How to add a transition
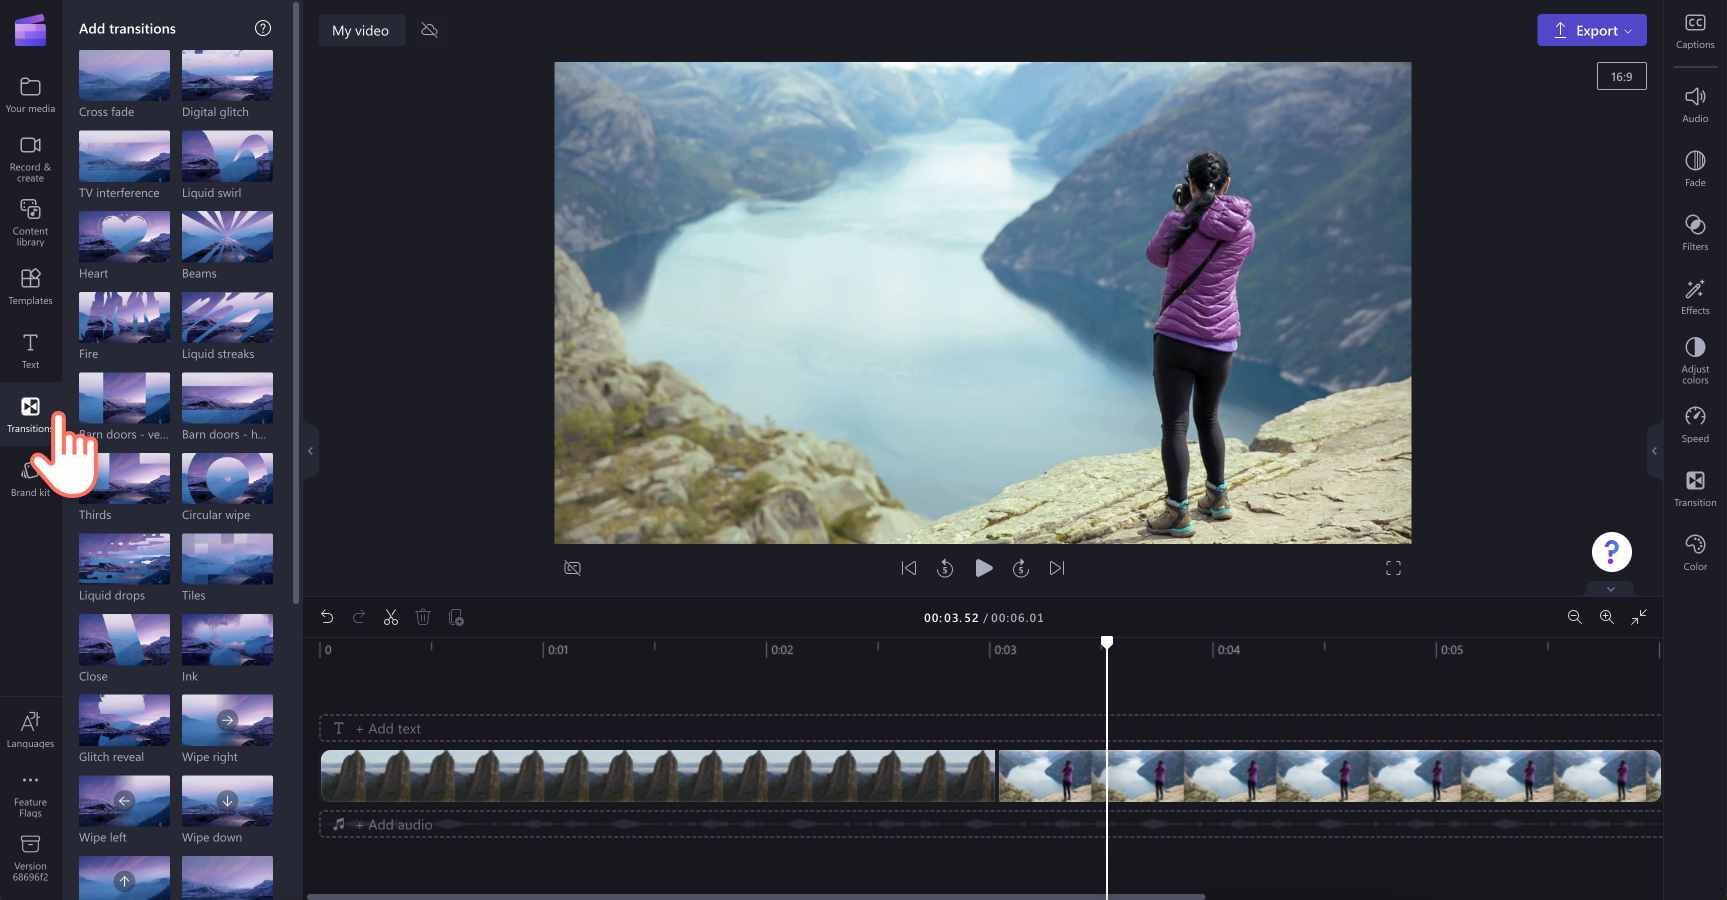
View available transitions in the toolbar
On the left side of the editor, select the Transitions tab to view all transitions that Clipchamp offers. Hover your cursor over an entry in the collection to view an animated preview.
Add a transition between two clips
To add a transition between two video clips, drag and drop a transition onto the timeline between the media assets. The transition will automatically snap into place on the green icon that appears.

NOTE: Transitions can only be placed between two clips that are on the same row on the timeline. The clips must also be directly next to each other. If there is a larger gap between the clips, it's not possible to add a transition at this spot. You can remove gaps by right-clicking on any empty space on the timeline and selecting Delete all visual gaps from the menu that appears.
Edit the duration of your transition (optional)
To edit a transition, select it on the timeline, then click on the Transition tab on the right property panel. There, you can change the transition effect and adjust its duration.
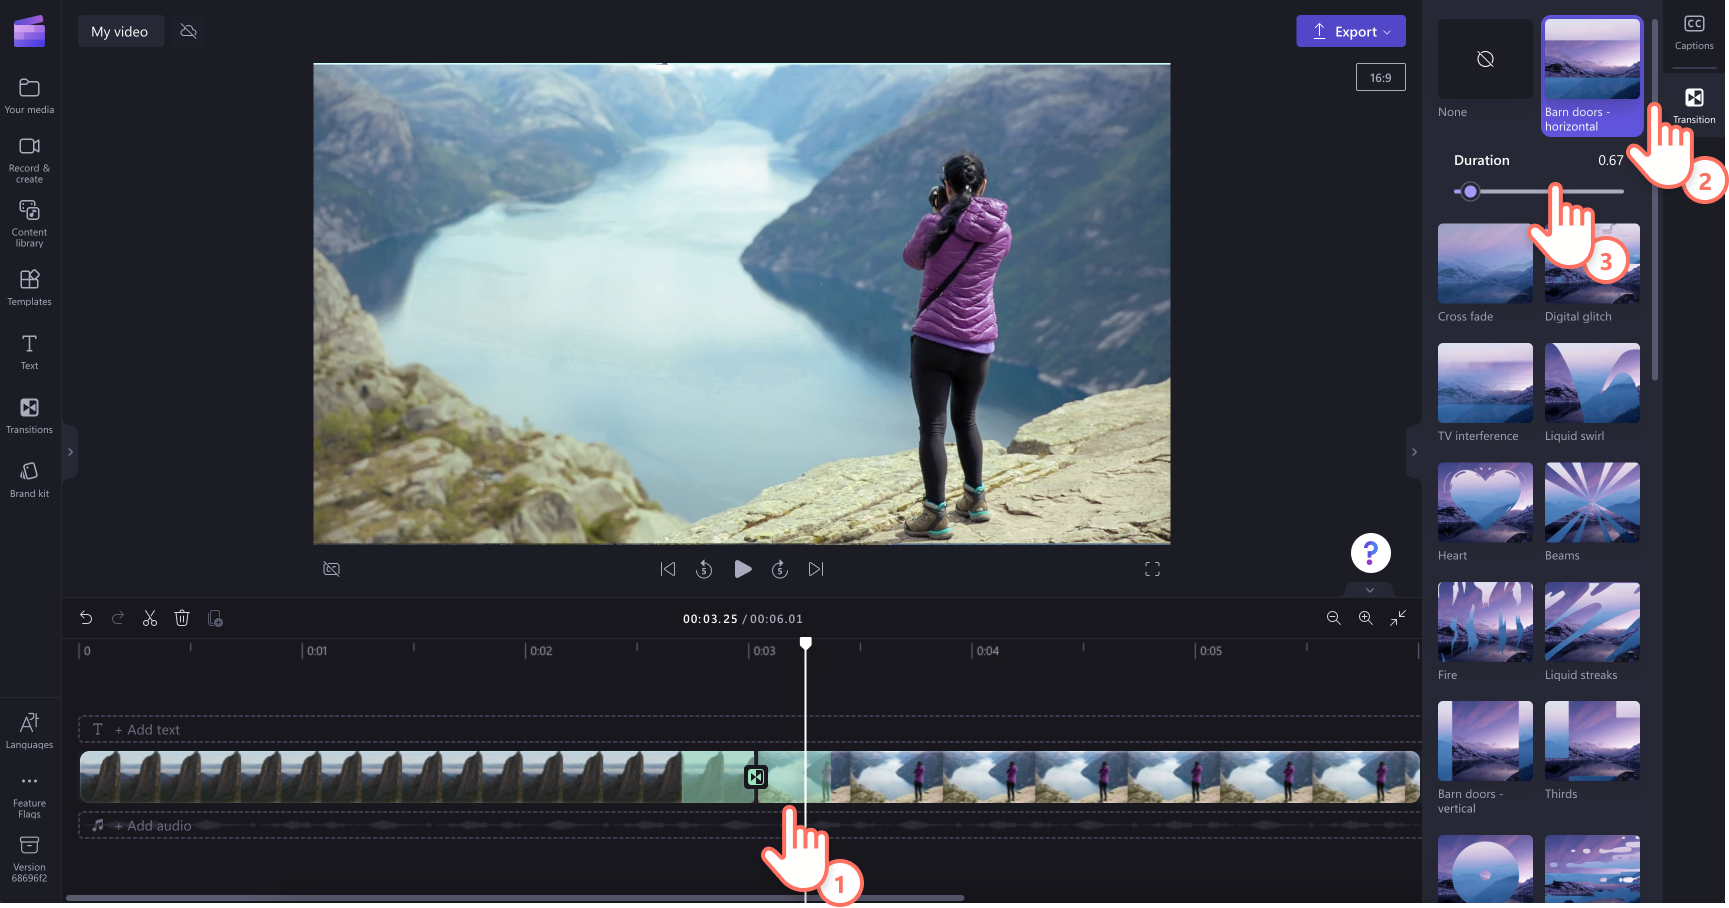
To edit the duration of your transition, slide the Duration toggle left and right.
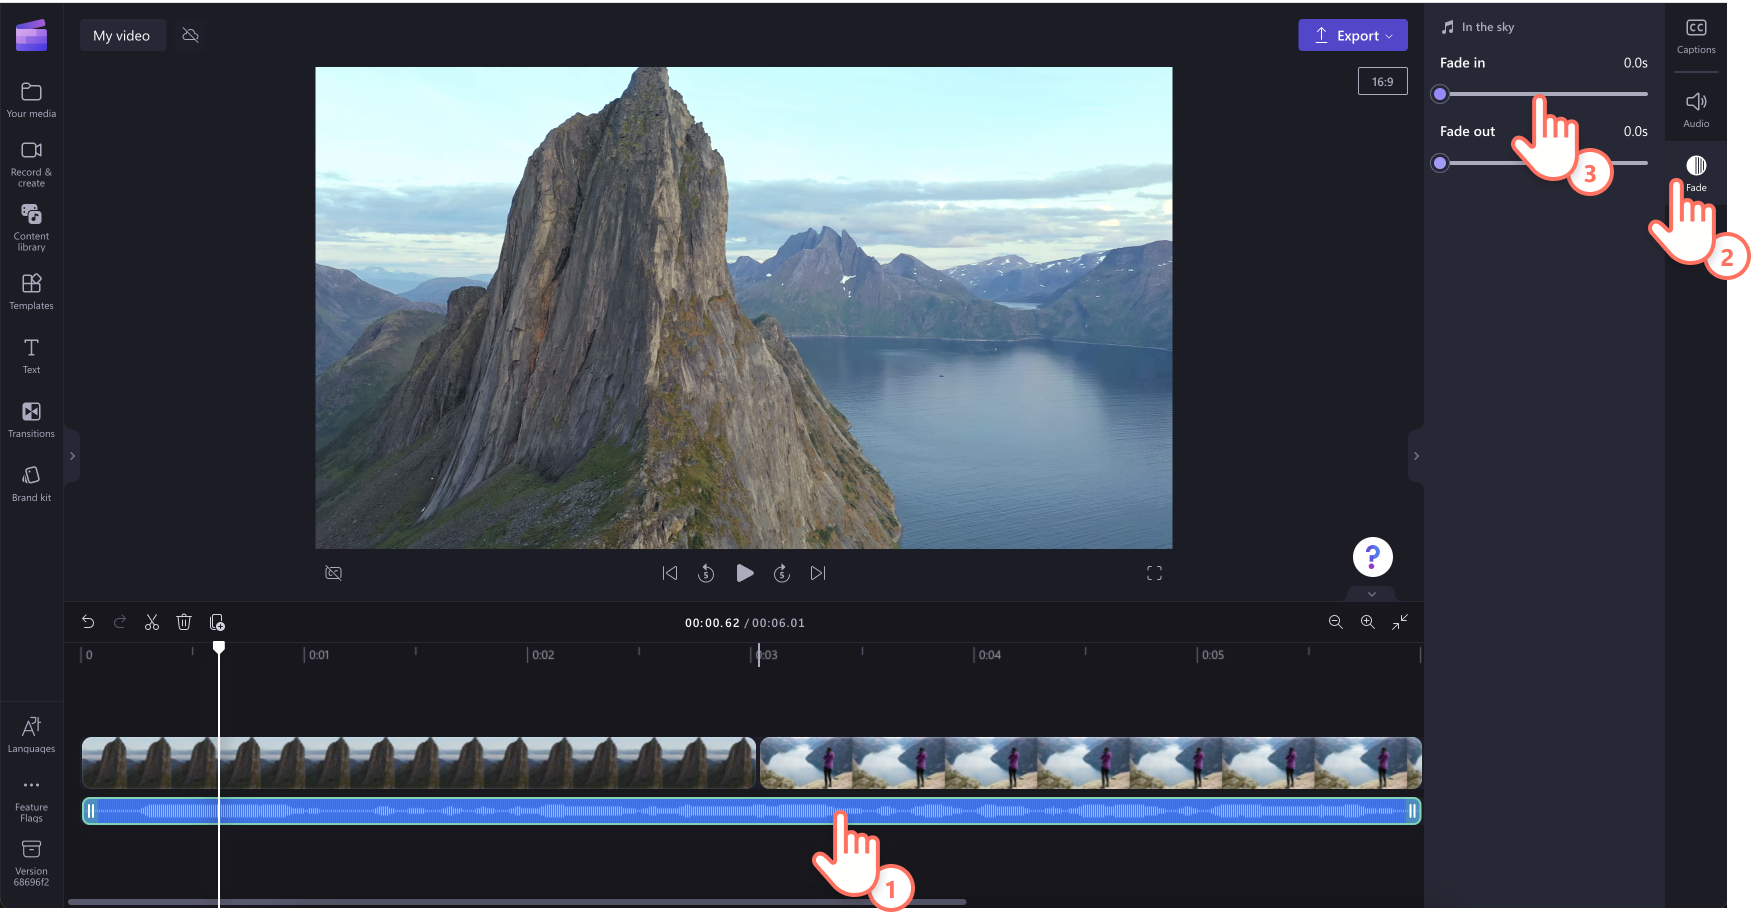
How to fade in and out of a video clip
To add a fade effect to a video, image, or audio clip, first ensure you've added the clip to the timeline. To reveal fade editing options, select the video on the timeline so it's highlighted. Then, click on the Fade tab on the property panel.

Slide the toggle left and right to add fade-in and fade-out time durations. The maximum length that is currently supported is 2 seconds.
How to fade in and out of audio or music
Adding a fade effect to an audio track is the same process as fading in and out of video clips. Select an audio file on the timeline so it's highlighted. Then, use the fade-in and fade-out sliders to adjust the fades.
NOTE: If your video has audio within the video, the fade effect will be applied to the video's audio automatically. Fading audio separately will only work if the audio file is a separate media asset on the timeline. To separate an audio track from a video, you can use the Detach audio tool.
Removing a fade effect or transition
To remove a fade effect, select the media asset that the effect is applied to on the timeline, then click on the Fade tab and drag the sliders back to their original position on the left-hand side.
To remove a transition, select it on the timeline (the icon between two clips) and hit the Delete key or the Trash icon.


