
Note: The screenshots in this article are from Clipchamp's personal version. The same principles apply to Clipchamp for work accounts.
Edit the volume of your video clip in Clipchamp by selecting it on the editing timeline and moving the audio volume slider to more or less than 100%. The following article shows the steps to achieve this. Note that the instructions are the same for editing the volume on music and SFX files.
How to increase or decrease the volume
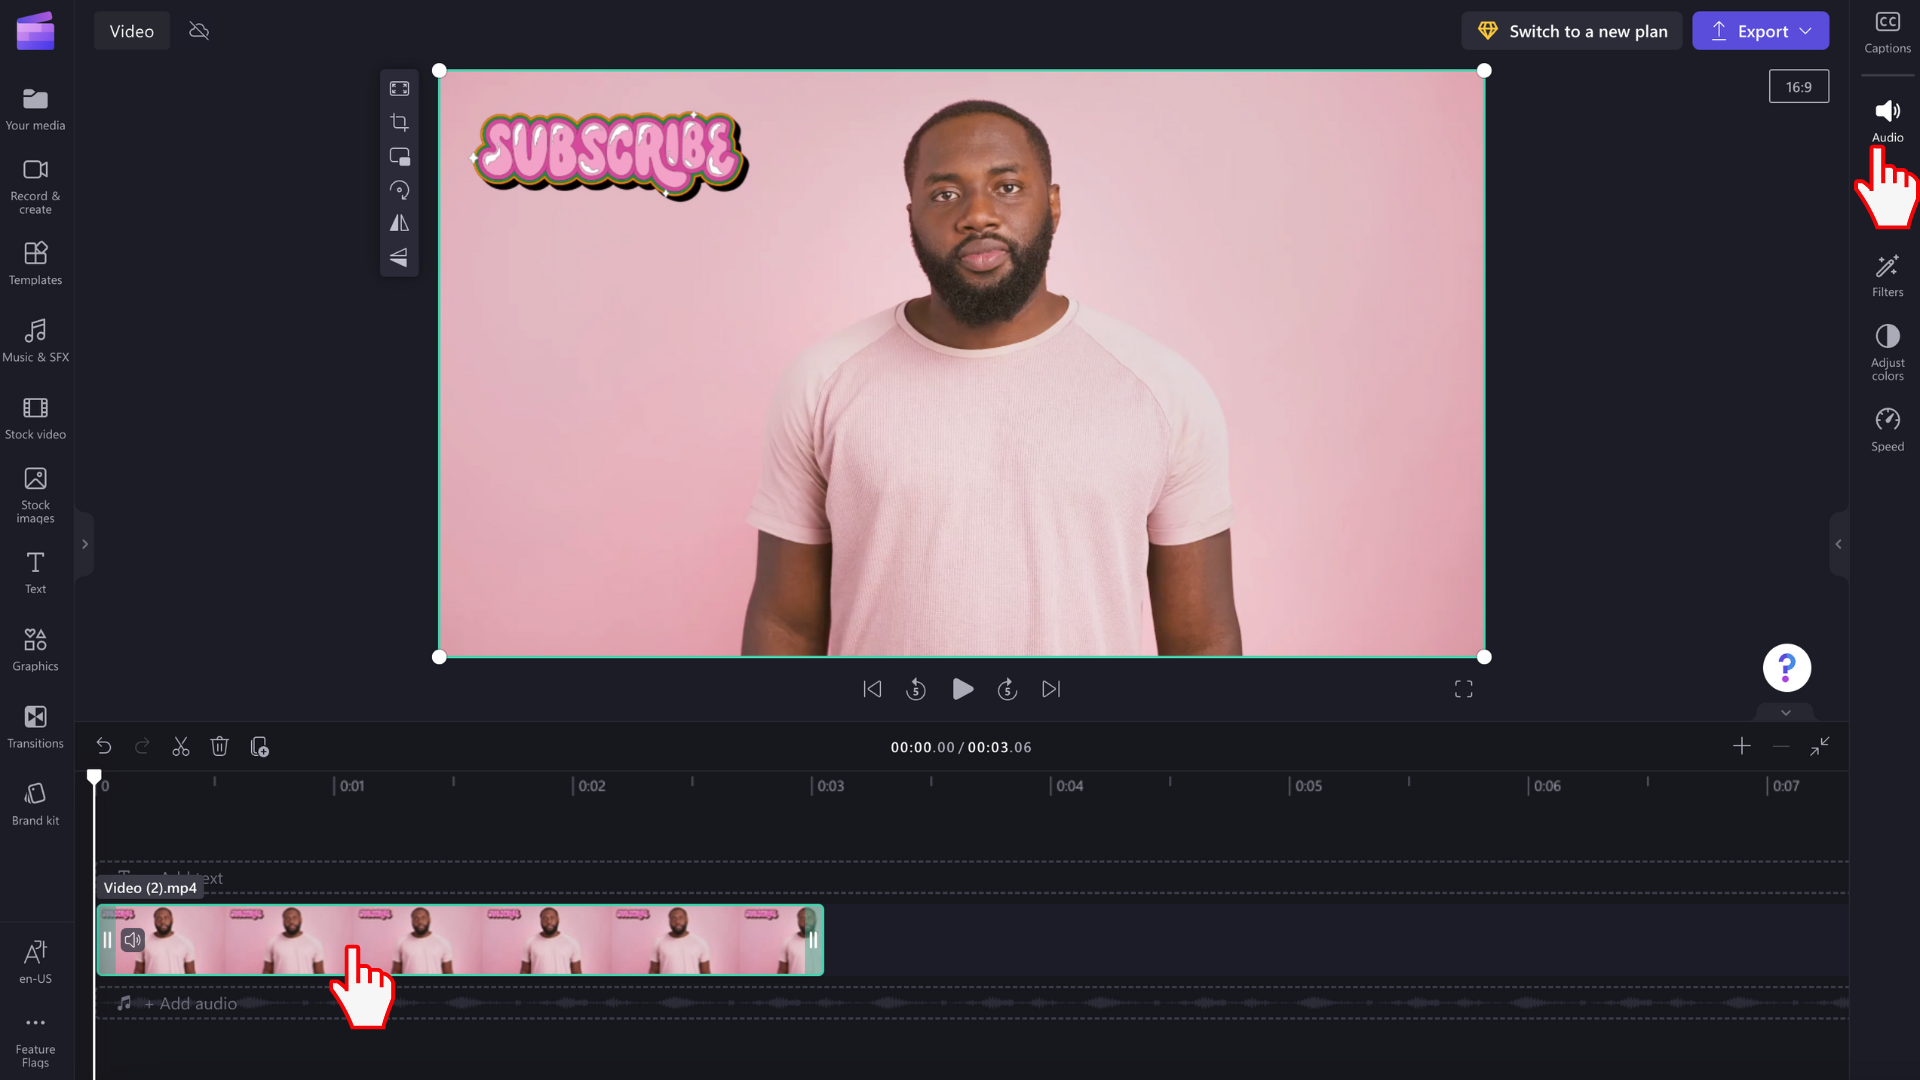
Step 1. Select the clip, then open the audio options
Click on the video in the timeline so it's highlighted. Then, select the audio tab on the right sidebar. Audio editing options will appear.
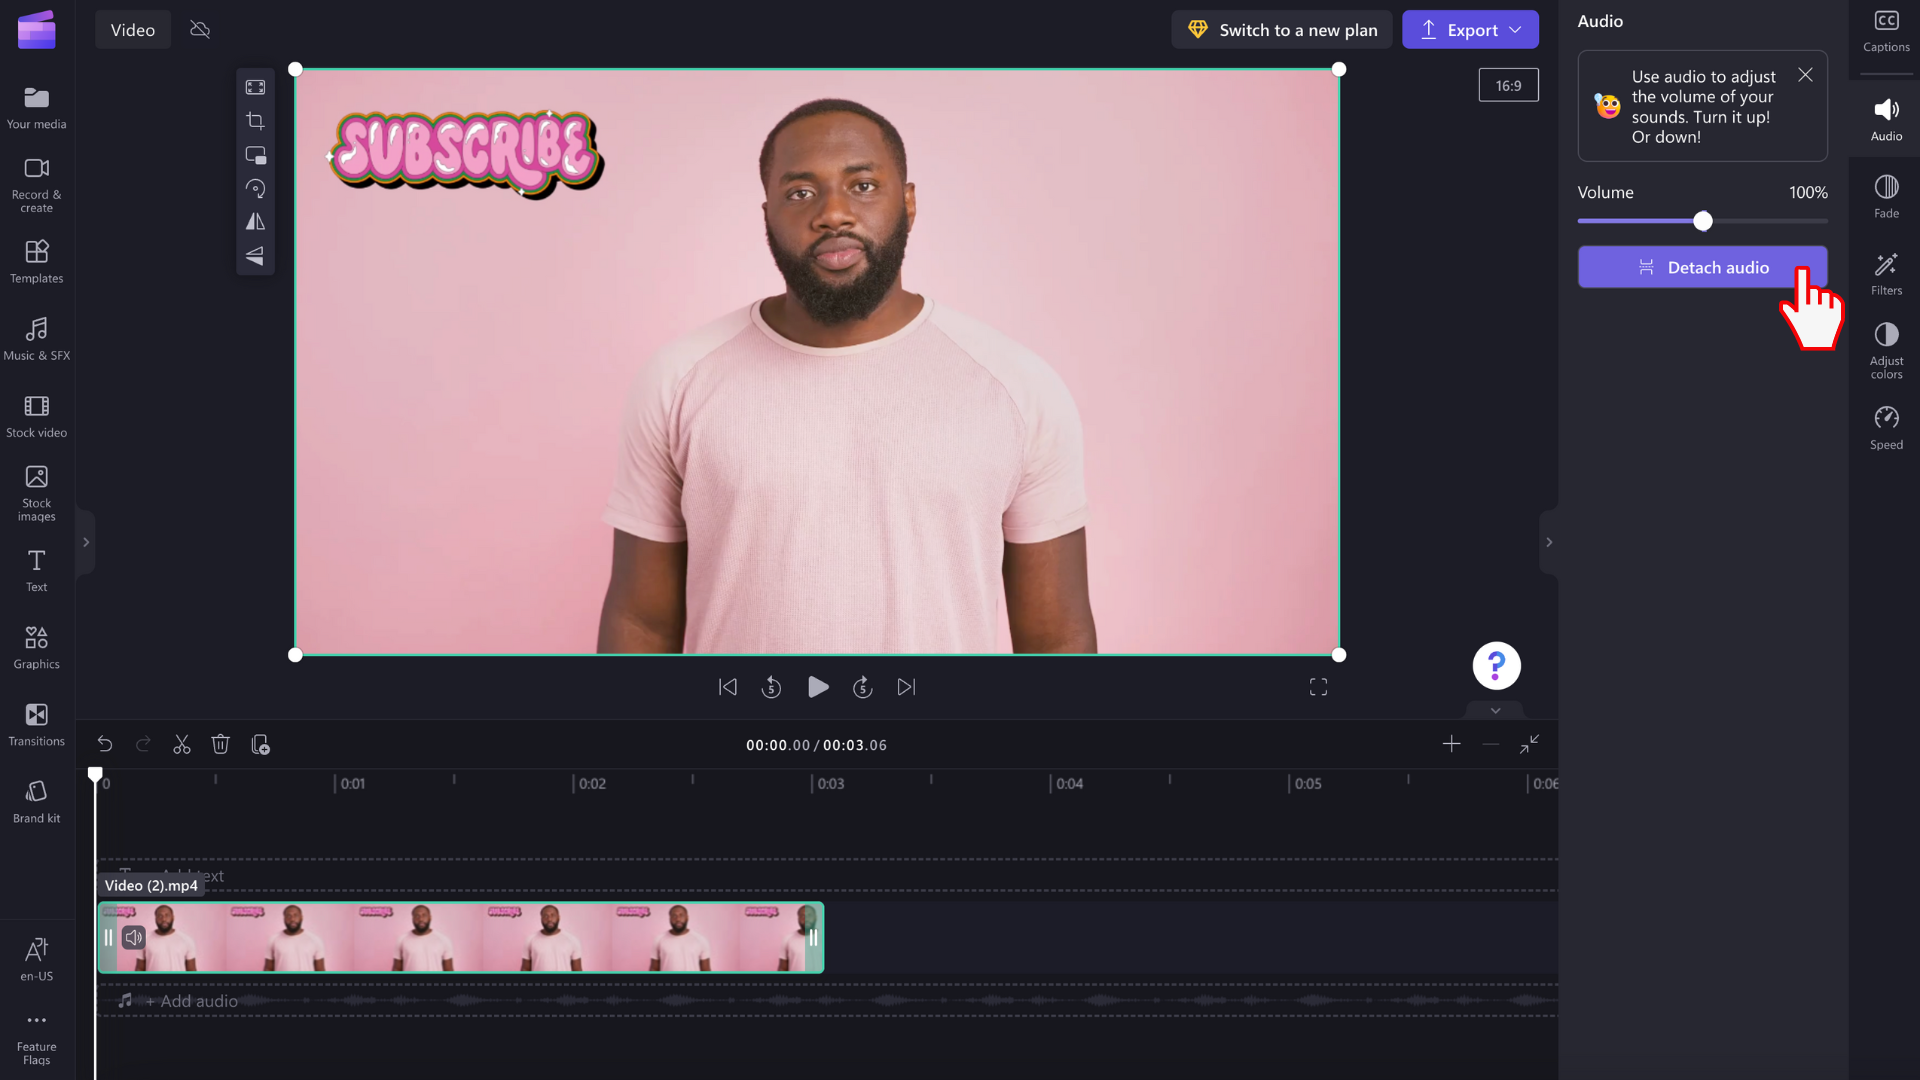
Step 2. Use the volume slider to change the volume intensity
In the audio tab, drag the track volume slider down to the desired percentage. The video volume will automatically be 100%. Either drag left for lower volume or right for higher volume.

How to detach and delete your video's audio
You can also detach the audio from your video by clicking on the Detach audio button.
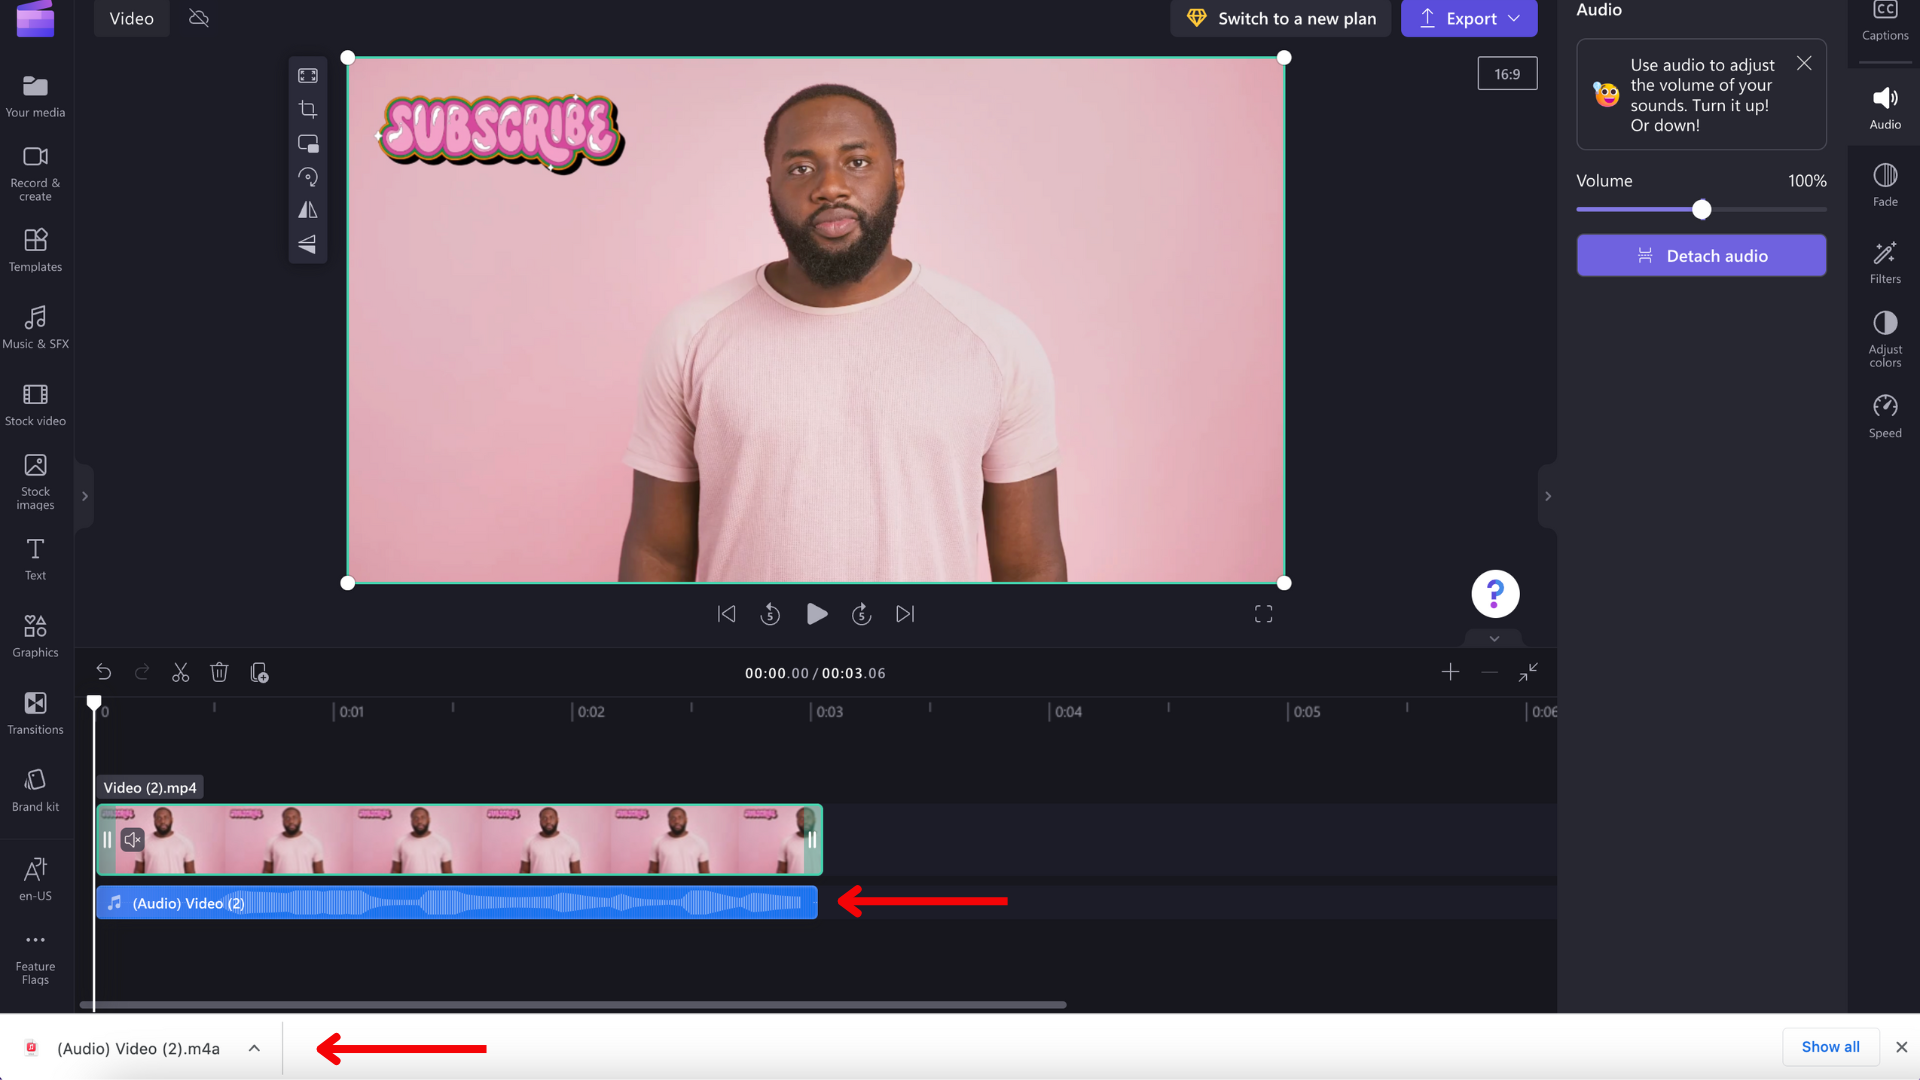
Your video's audio will automatically detach and be placed under the video track in a new row on the timeline. The audio file will also automatically save to your device so that you can access it again later, for instance when relinking media assets is required.
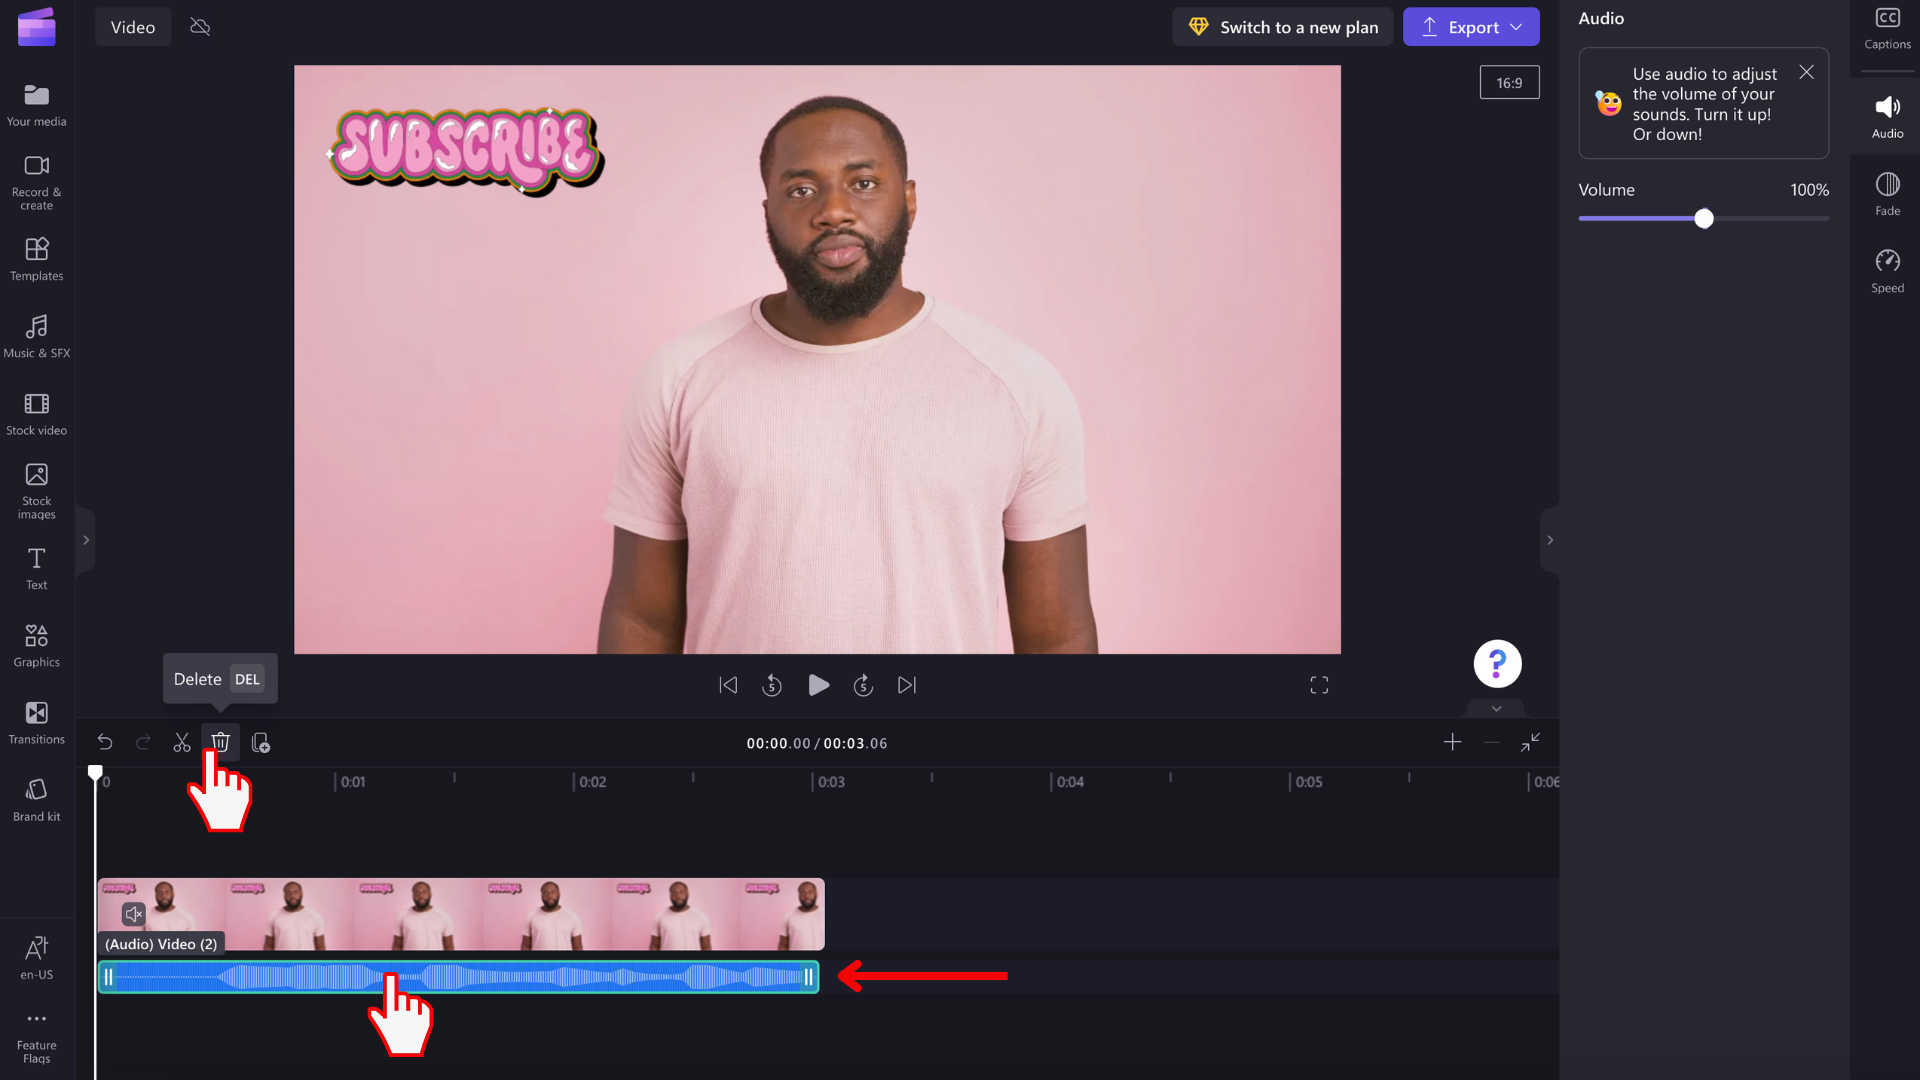
If you want to delete the audio, select the audio file on the timeline so it's highlighted. Next, select the trash can button or use the Delete key on your keyboard.
Undoing a change
You can return the video or audio clip to its original volume at any time by selecting it on the timeline again and moving the slider back to 100%. You can also use the Undo and Redo buttons.
Adding a fade-in or fade-out effect
In addition to adjusting the audio volume as described above, you can also add a fade-in or fade-out effect to a clip. This is useful to slowly increase or decrease the volume at the start or end of a video. Find out how you can achieve this in the following article: How to add transitions and fades.


