
Note: The information in this article applies to both Clipchamp for personal accounts and Clipchamp for work. The captions feature slightly varies in design and tutorial.
Make your videos more accessible and easier to watch on mute by adding subtitles. Our intuitive captions feature automatically detects what’s said in a video or audio track, then generates real-time subtitles in just one click.
Find out how to add captions to your videos in the following sections:
Autocaptions can be used for:
-
Generating a transcript located in the captions tab.
-
Indexing your video to easily go directly to a specific timestamp using the transcript.
-
Creating subtitles for a video automatically.
The feature is available in many languages that you can choose from, see the full list of languages here.
Note: When using the autocaptions feature, Clipchamp must use Azure Cognitive Services to process your video's audio to generate your captions.
How to use autocaptions
Step 1. Import your video
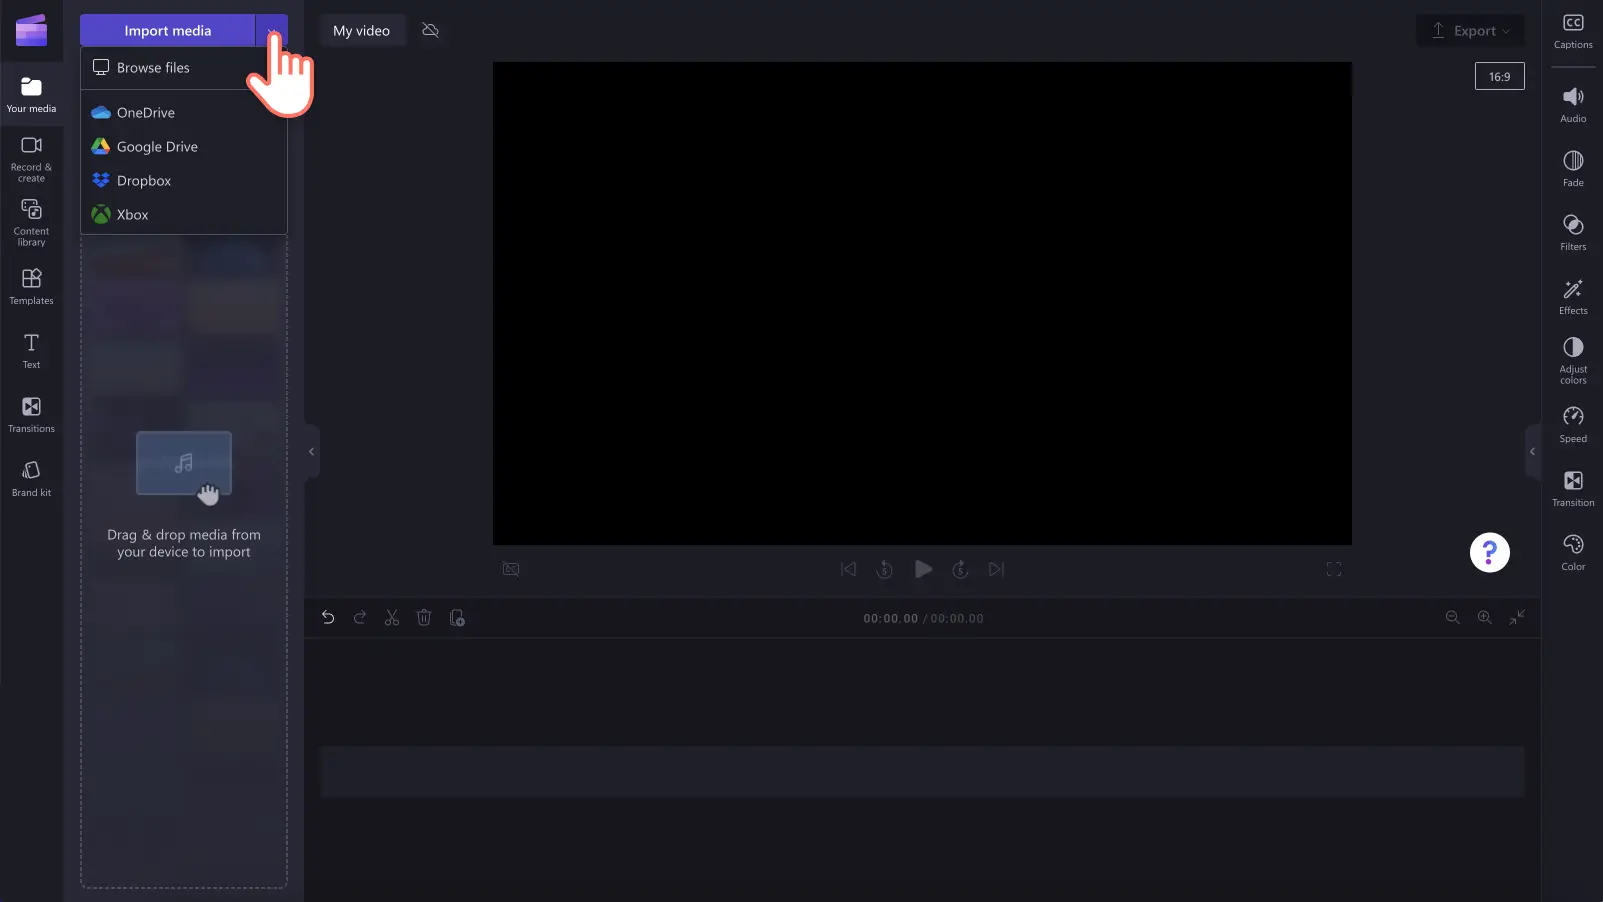
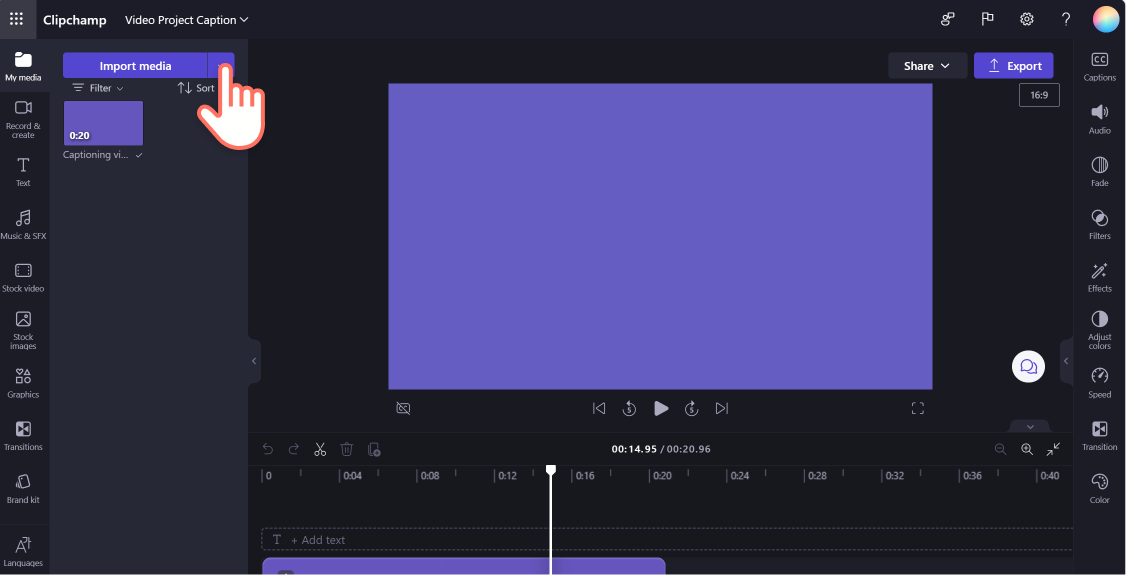
To import your own videos, photos, and audio, click on the import media button in the your media tab on the toolbar to browse your computer files, or connect your OneDrive.
You can also record a video directly in the editor using our webcam recorder in the record & create tab on the toolbar. To learn how to do this, read: how to record a webcam video.
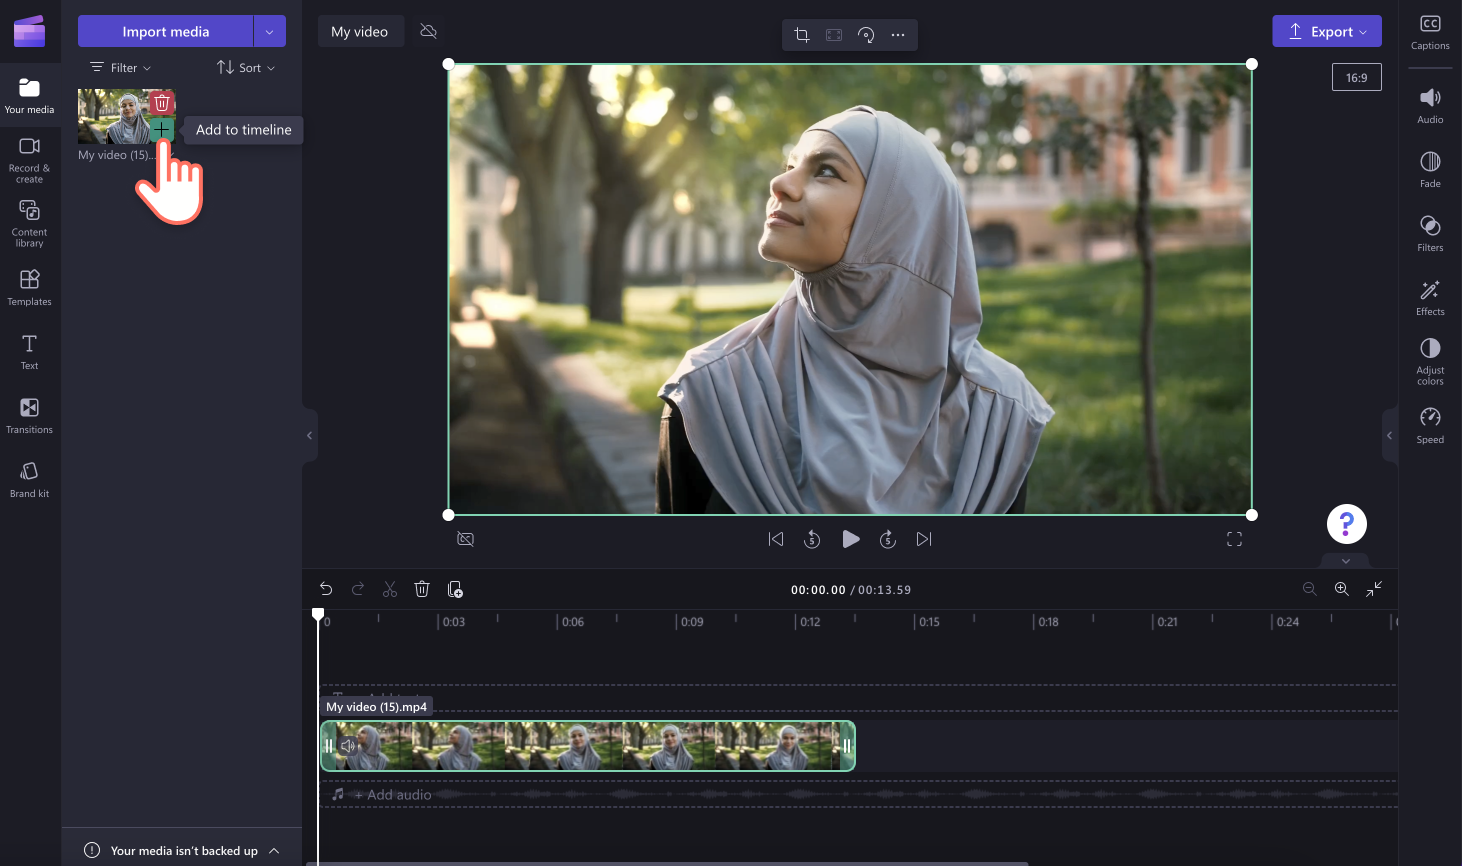
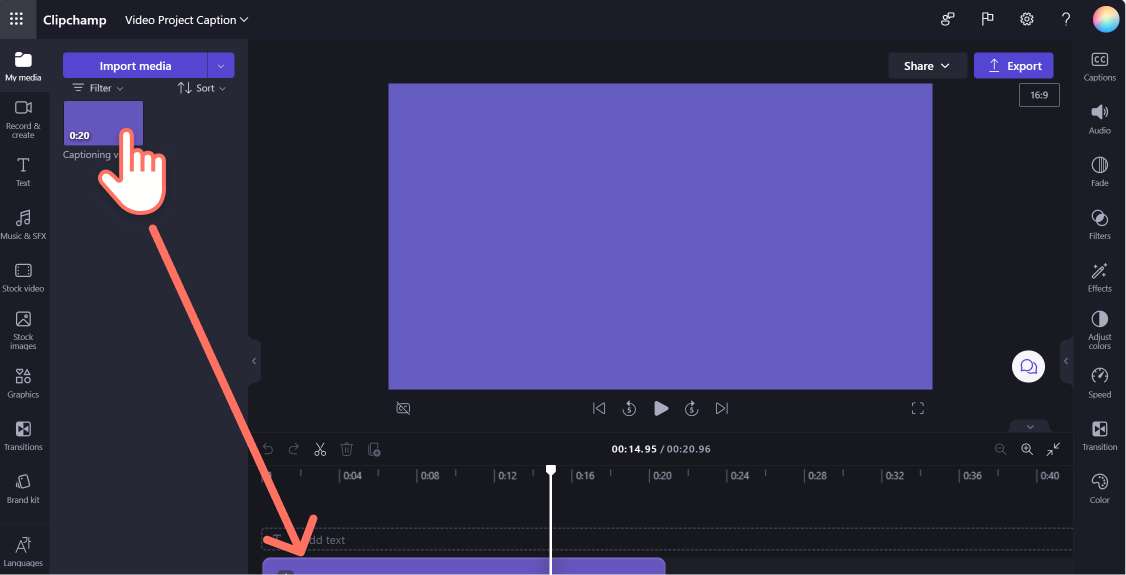
Next, drag and drop each video onto the timeline from the your media tab.
Step 2. Turn on autocaptions
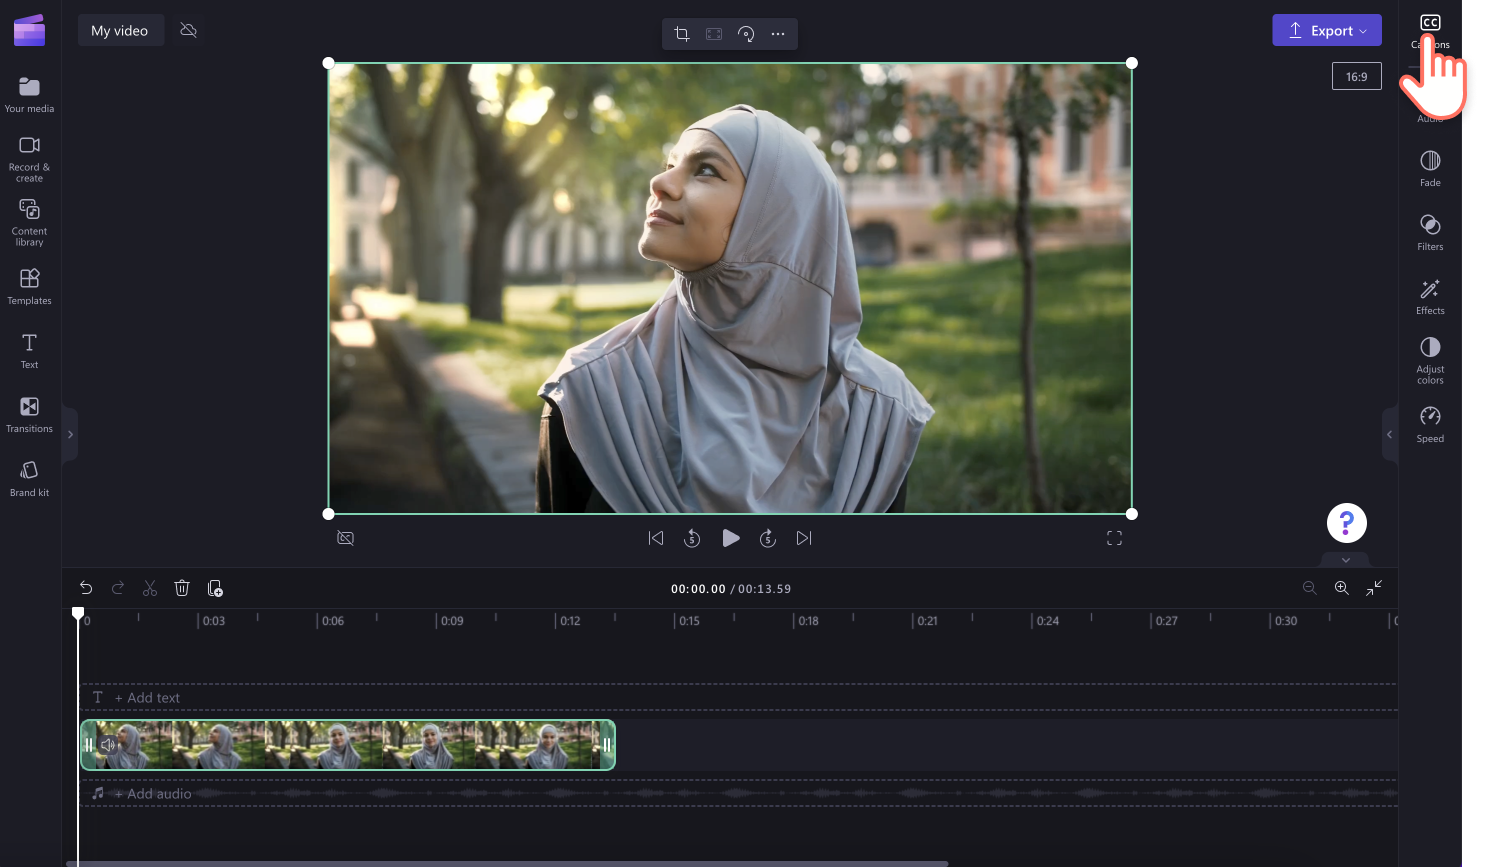
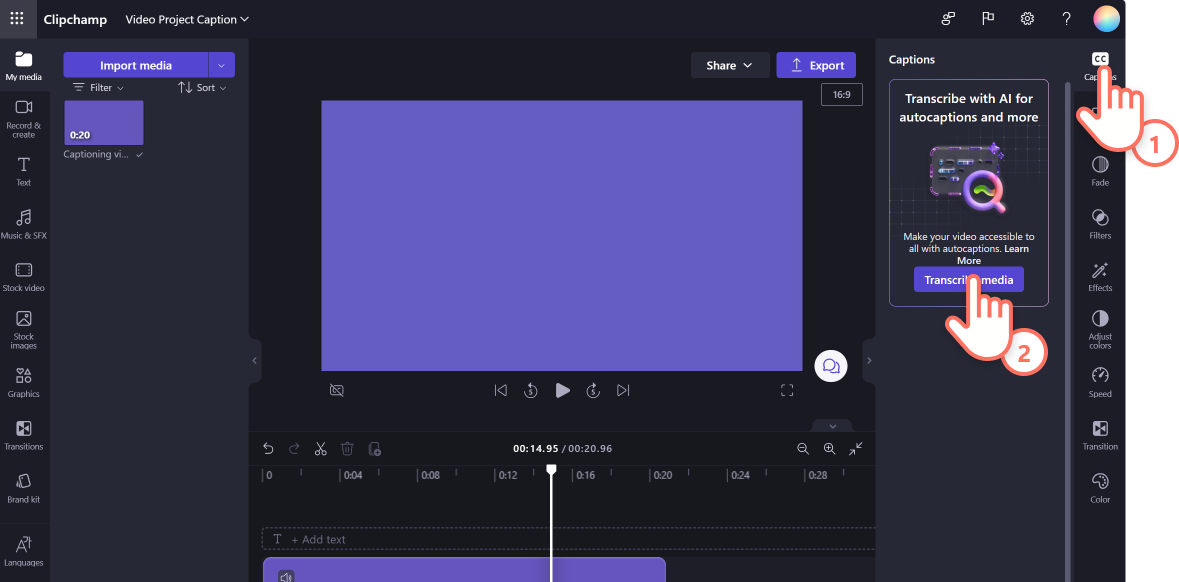
Click on the captions tab on the property panel.
Next, click on the turn on autocaptions button.
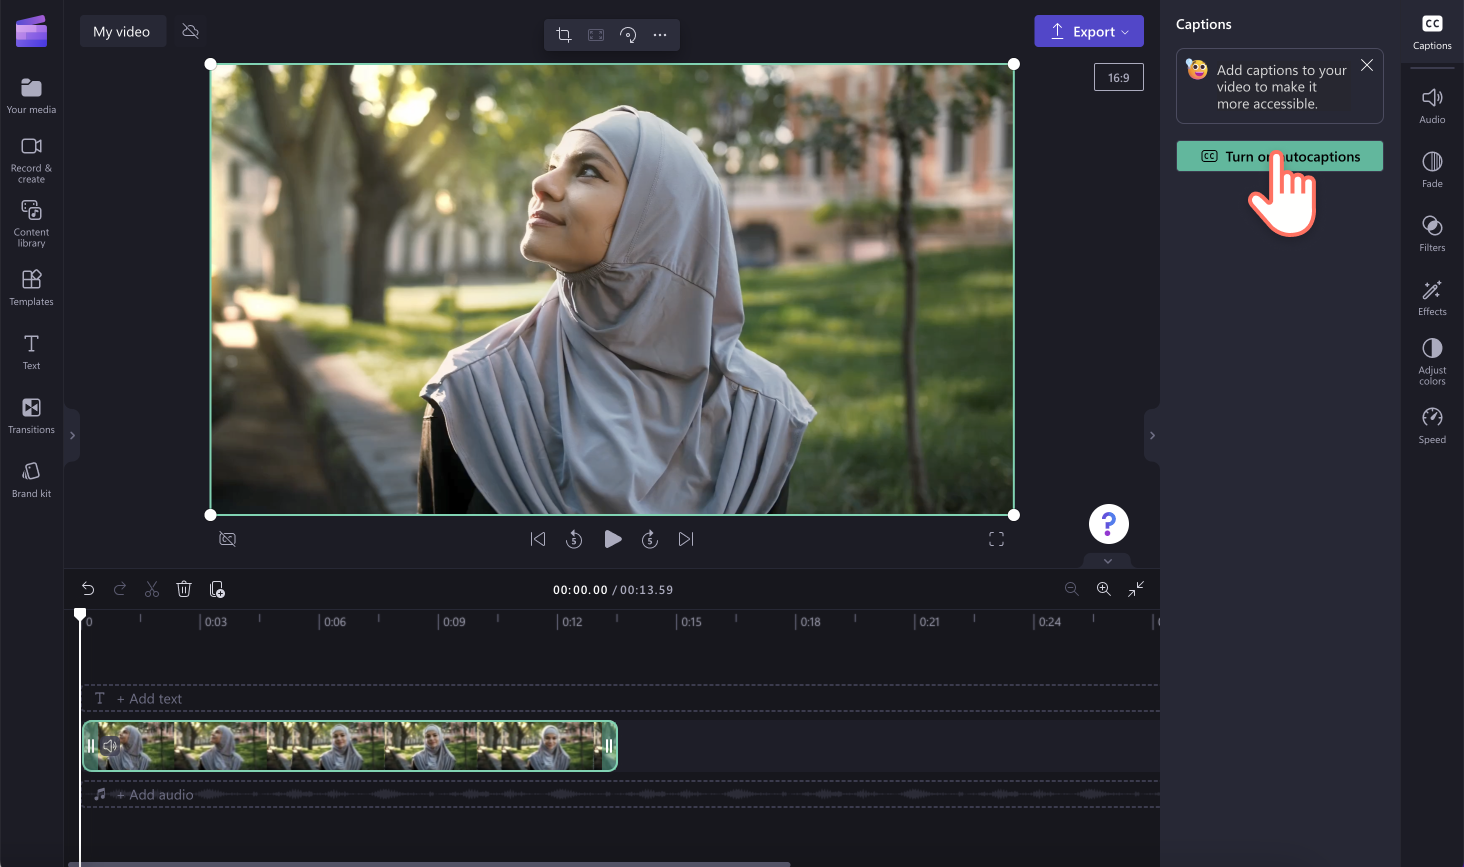
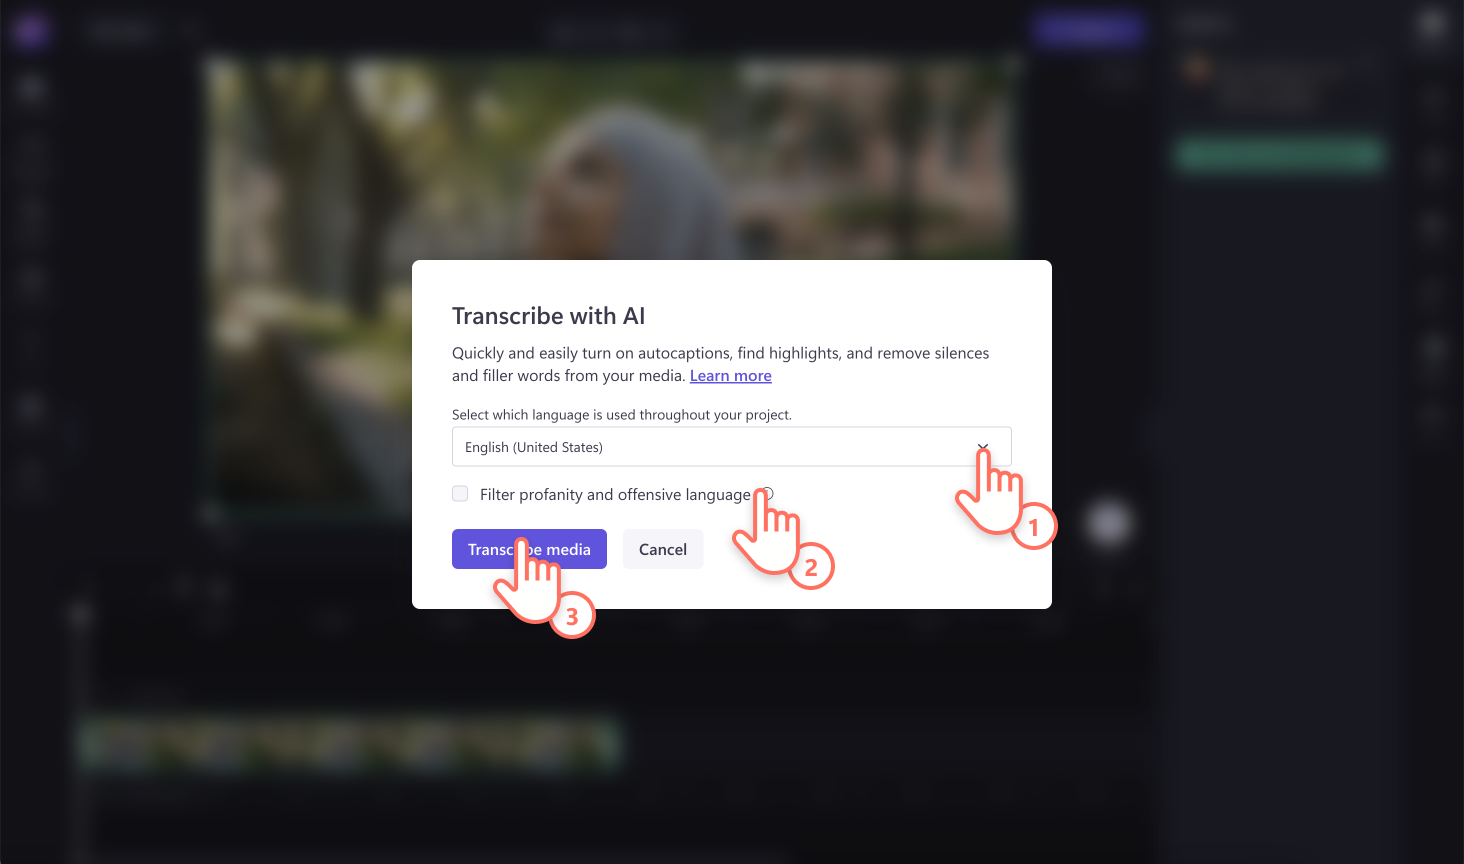
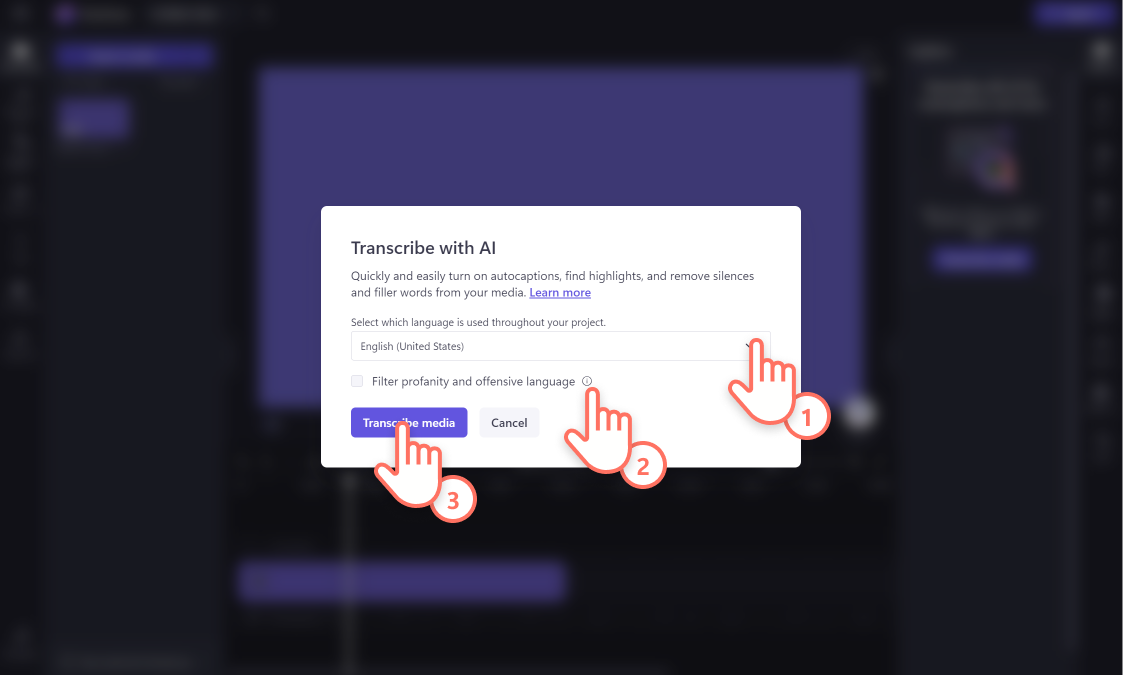
A popup window will appear with caption recognition language options. Select the language that is used throughout your video. You can also check the box to filter out any profanity and offensive language.
Currently, we offer single languages per video. After you select a language, autocaptions will attempt to interpret all spoken audio as the same language.
Click on the transcribe media button to continue.
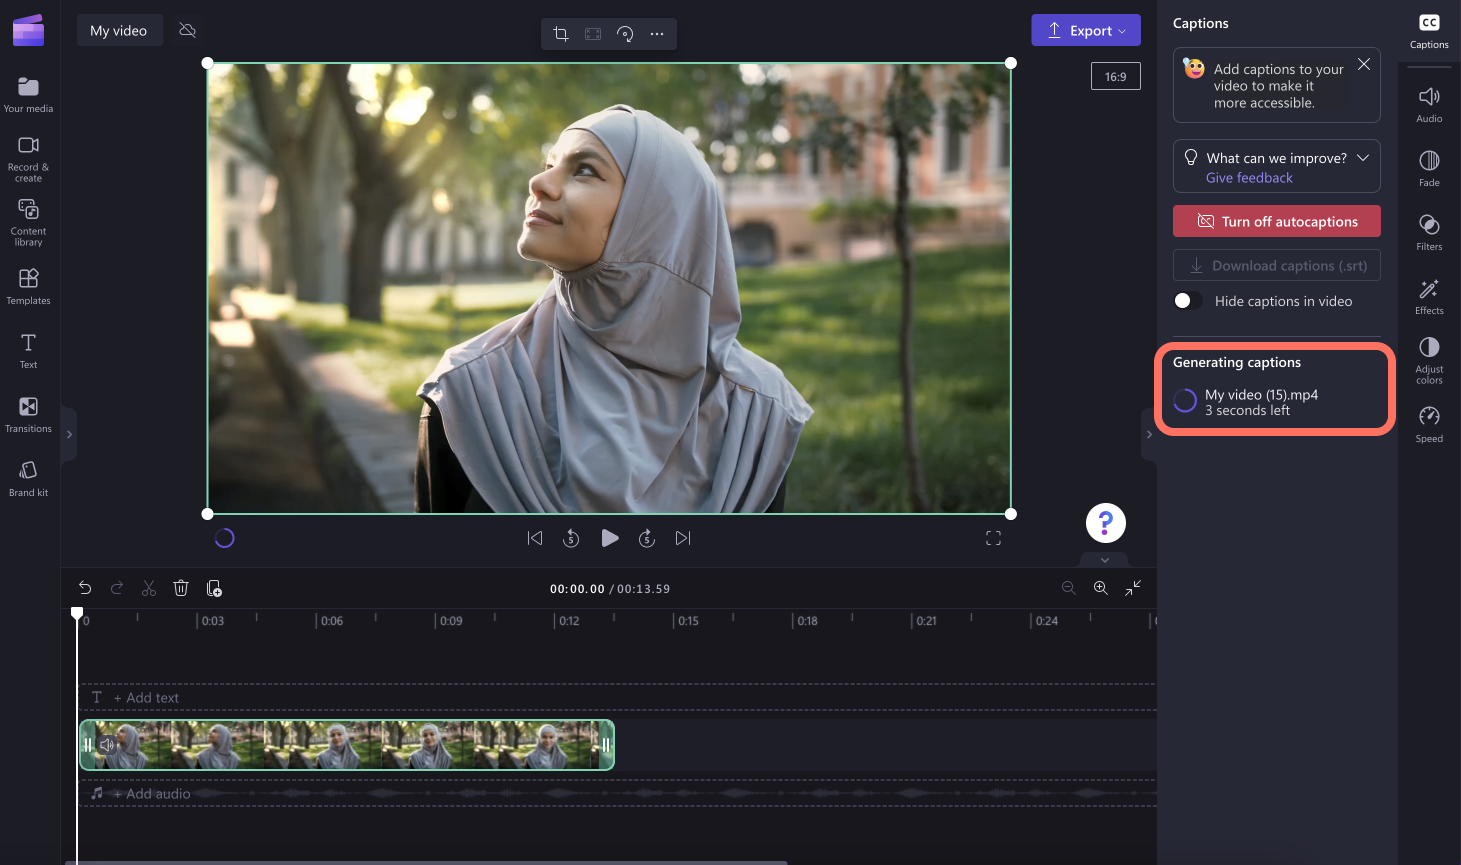
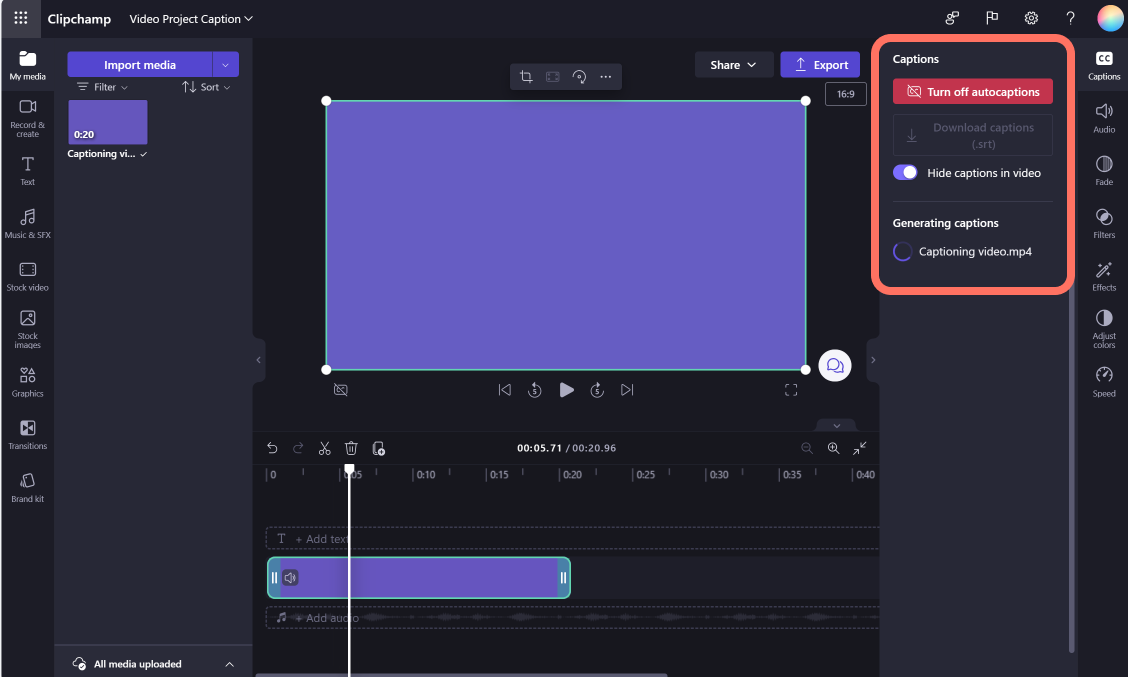
You will automatically return to the editor and see your subtitle text being generated in the captions tab on the property panel. The captions generation time will depend on your internet connection, speed, and the length of your video.
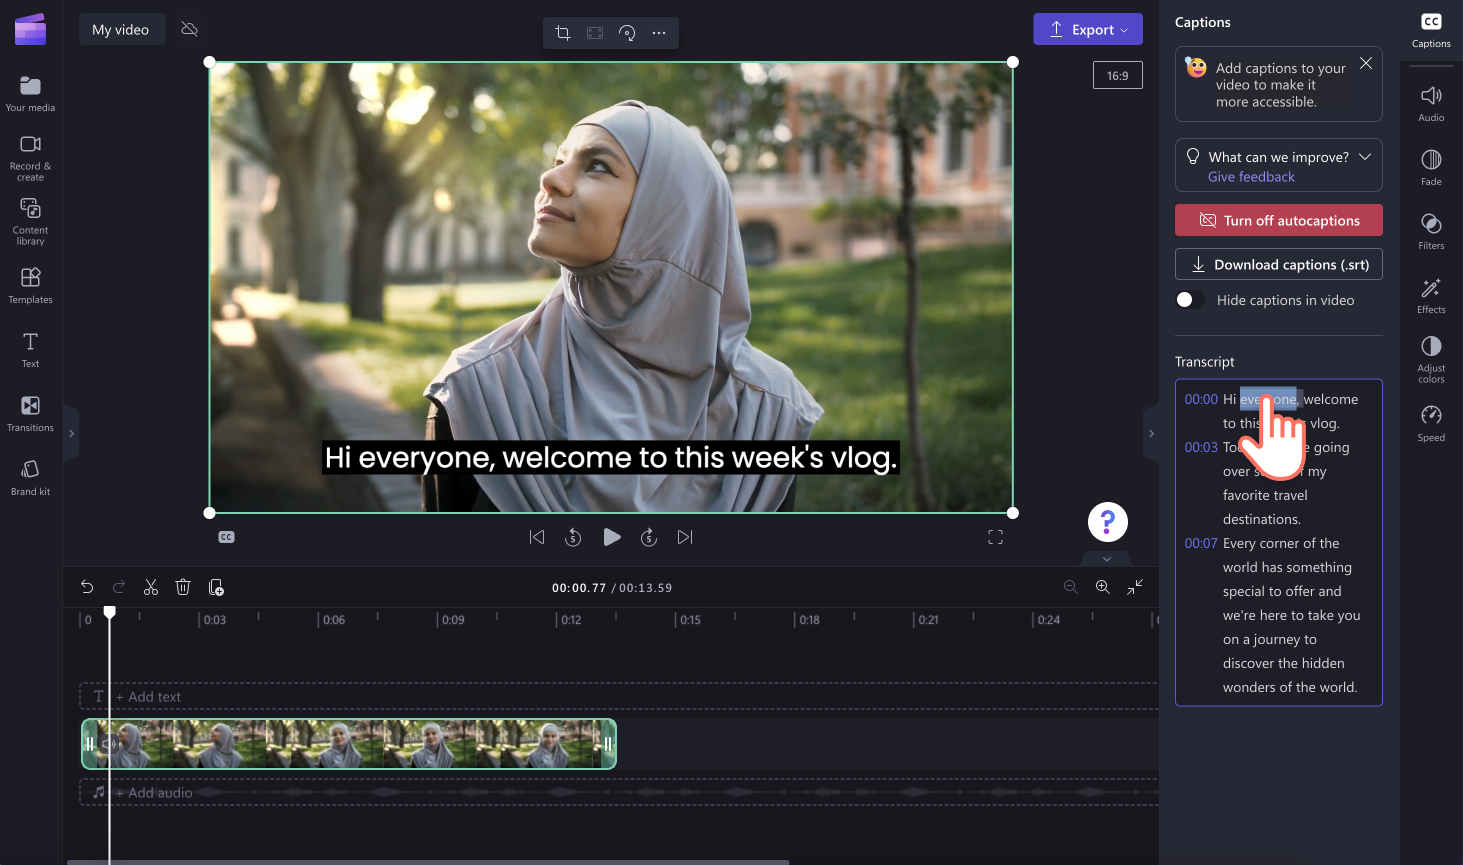
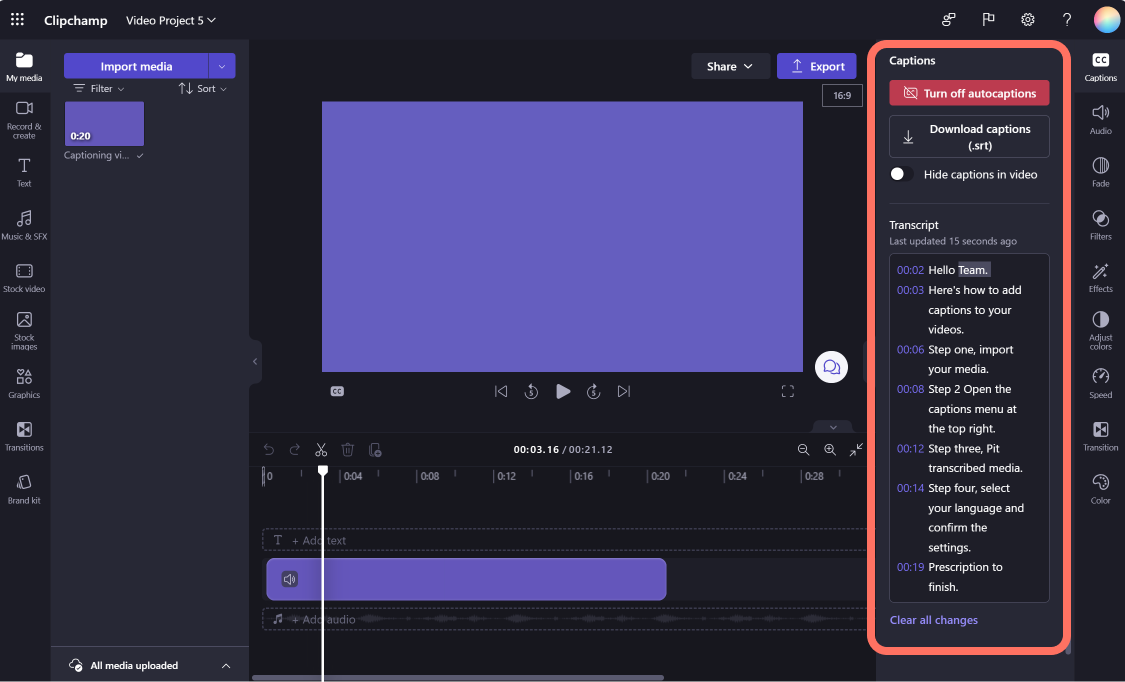
Once your captions have loaded, a transcript will appear in the transcript section of the captions tab on the property panel. Your captions will also appear on the video preview window.
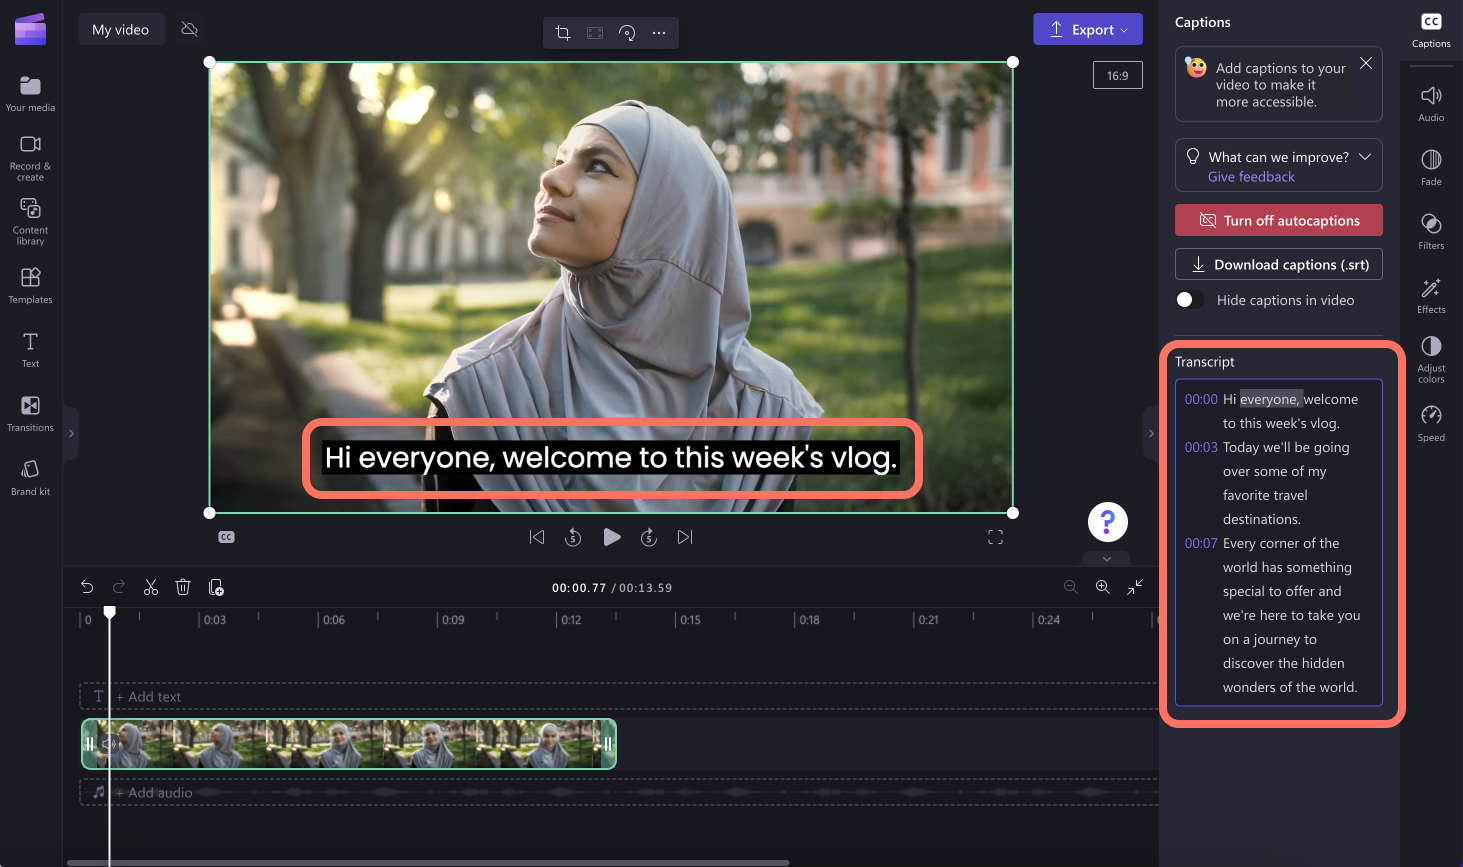
To playback your autocaptions, click on the play button under the video preview.
Step 3. Save your video with captions
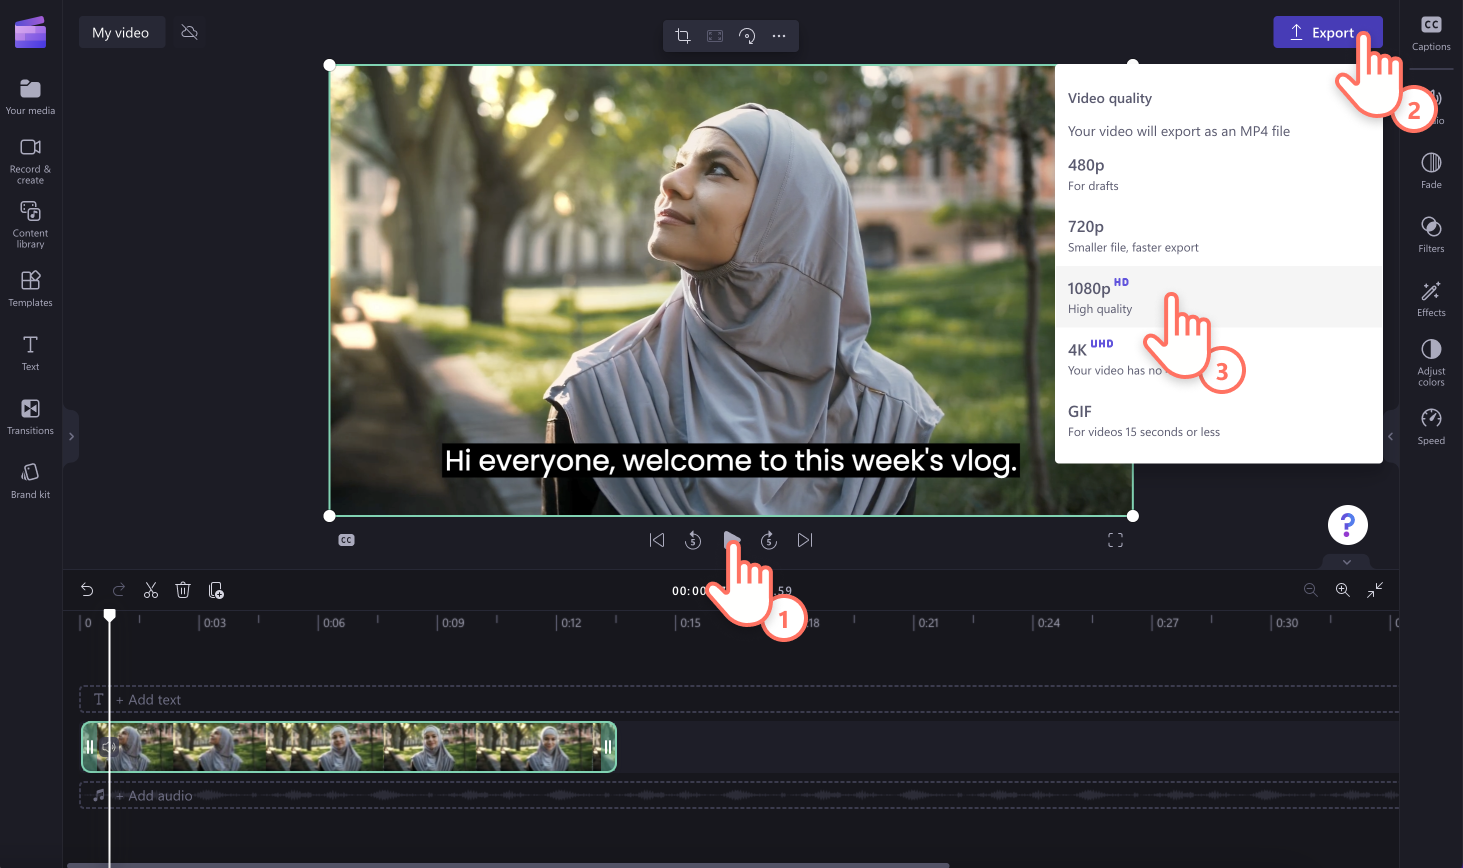
Before saving your video, make sure to preview by clicking on the play button. When you’re ready to save, click on the export button and select a video resolution. We recommend saving all videos in 1080p video resolution for the best quality. Paid subscribers can save in 4K video resolution.
How to edit autocaptions and customize appearance
Editing the transcript
If a word is misspelled or incorrect in the transcript, click on the specific word on the transcript and rewrite the word(s). Only the owner of the video will have access to view and edit the video and transcript.
Editing the appearance of autocaptions
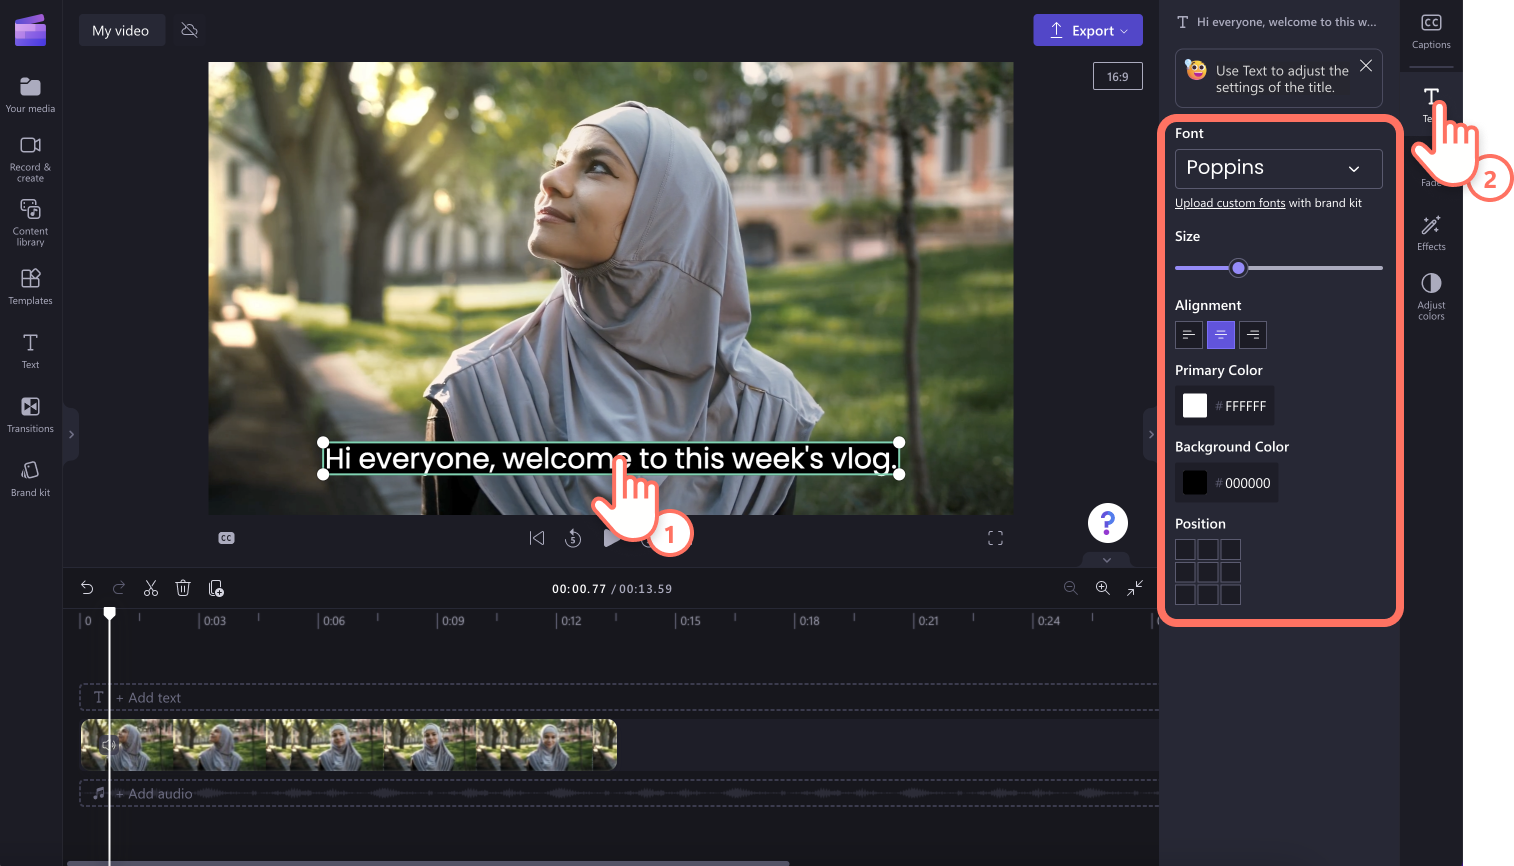
To edit the appearance of your subtitles, click on your captions on the video preview. This will open up different options on the property panel. Next, click on the text tab on the property panel. Here, you can edit the font, size, alignment, colors, and position.
How to download the SRT file from the autocaptions
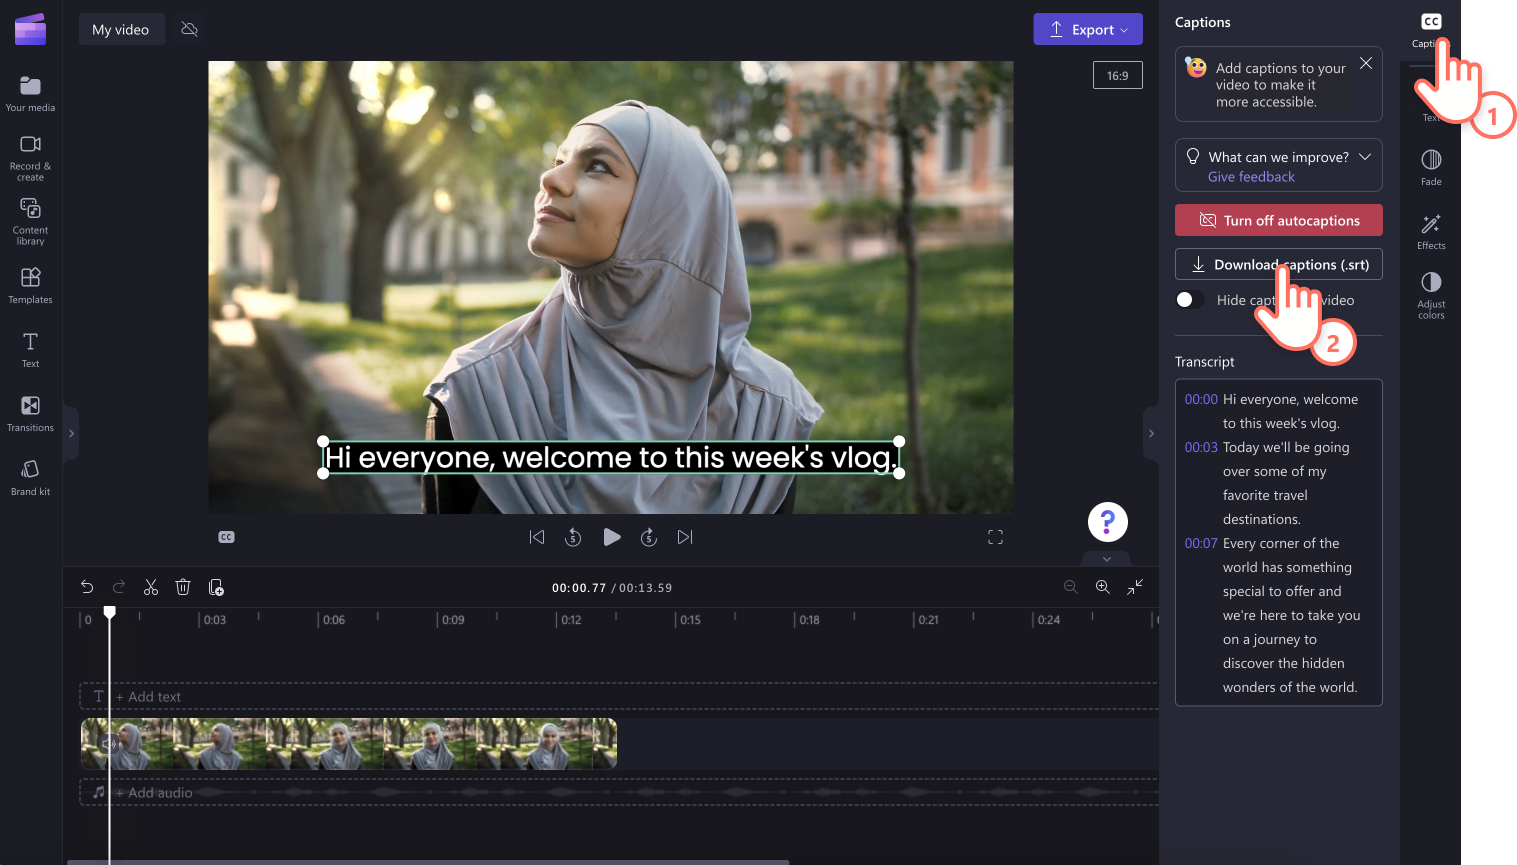
SRT is a standard format for representing subtitles, also known as SubRip Subtitle file format. SRT files give you the option to add subtitles to a video after it’s produced.
You can download the SRT file for the captions in your Clipchamp project by clicking on the download captions button in the captions tab on the property panel.
How to hide autocaptions
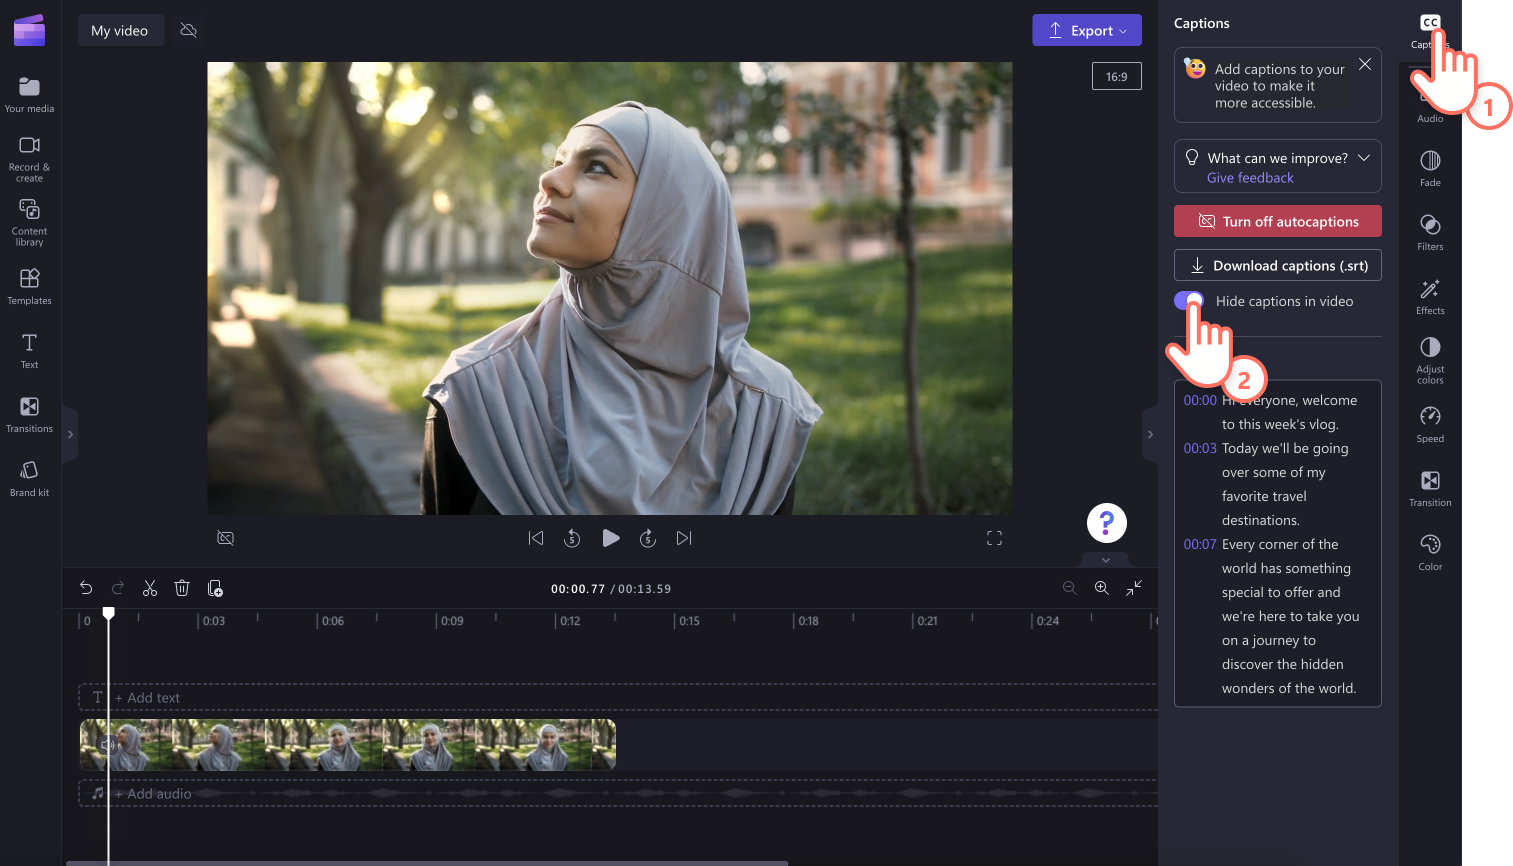
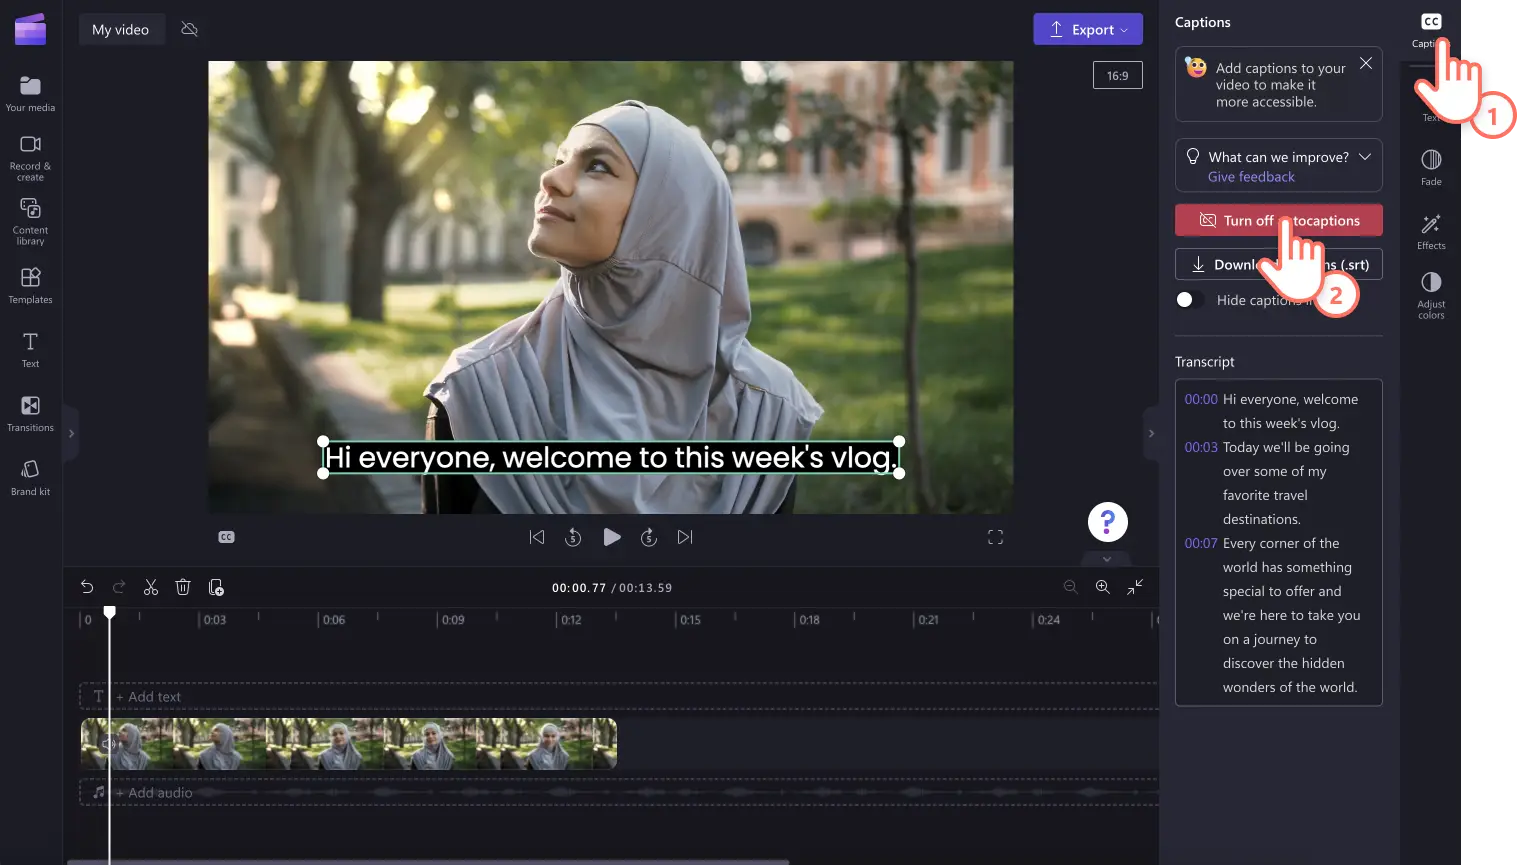
You can hide captions on your video by clicking on the hide captions in video toggle. This will hide the captions from your video preview, but keep the transcript in the captions tab.
How to turn off autocaptions
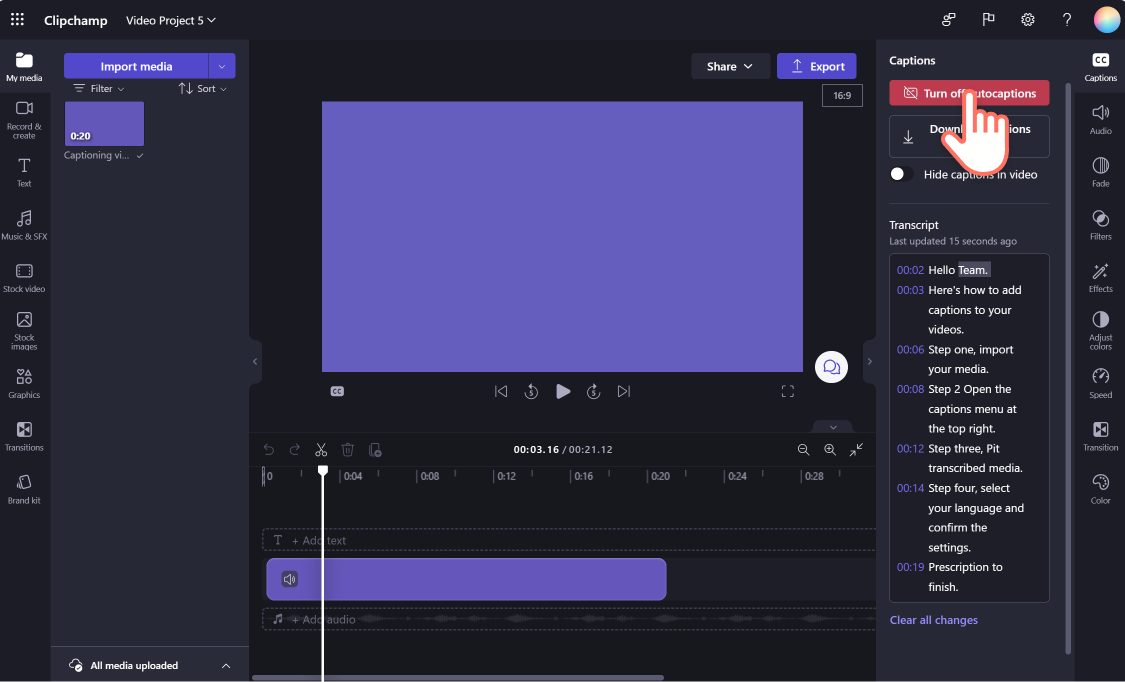
To turn off autocaptions, click on the captions tab then click turn off autocaptions button. The captions will be removed from your video, and will not export with captions.
Find out how to add captions to your videos in the following sections:
Autocaptions can be used for:
-
Generating a transcript located in the captions tab.
-
Indexing your video to easily go directly to a specific timestamp using the transcript.
-
Creating subtitles for a video automatically.
The feature is available in many languages that you can choose from, see the full list of languages here.
Note: When using the autocaptions feature, Clipchamp must use Azure Cognitive Services to process your video's audio to generate your captions.
How to use autocaptions
Step 1. Import your video
To import your own videos, photos, and audio, click on the import media button in the your media tab on the toolbar to browse your computer files.
You can also record a video directly in the editor using our webcam recorder in the record & create tab on the toolbar. To learn how to do this, read: how to record a webcam video.
Next, drag and drop each video onto the timeline from the your media tab.
Step 2. Turn on captions
Click on the captions tab on the property panel, then click on the transcribe media button to turn on captions.
A popup window will appear with caption recognition language options. Select the language that is used throughout your video. You can also check the box to filter out any profanity and offensive language.
Currently, we offer single languages per video. After you select a language, autocaptions will attempt to interpret all spoken audio as the same language.
Click on the transcribe media button to continue.
You will automatically return to the editor and see your subtitle text being generated in the captions tab on the property panel. The captions generation time will depend on your internet connection, speed, and the length of your video.
Once your captions have loaded, a transcript will appear in the transcript section of the captions tab on the property panel. Your captions will also appear on the video preview window.
Editing the transcript
If a word is misspelled or incorrect in the transcript, select the specific word on the transcript and rewrite the word(s). Only the owner of the video will have access to view and edit the video and transcript.
Editing the appearance of autocaptions
To edit the appearance of your subtitles, click on your captions on the video preview. This will open up different options on the property panel in the text tab. Here, you can edit the font, size, alignment, colors, and position.
Downloading the SRT file
SRT is a standard format for representing subtitles, also known as SubRip Subtitle file format. SRT files give you the option to add subtitles to a video after it’s produced.
You can download the SRT file for the captions in your Clipchamp project by clicking on the download captions button in the captions tab on the property panel.
How to turn off autocaptions
To turn off autocaptions, click on the captions tab then click turn off autocaptions button. The captions will be removed from your video, and will not export with captions.
Troubleshooting when captions aren't working
When you turn on the captioning feature and there is an error during the processing such as incorrect captions getting generated or no captions appearing even after some time, here are some suggestions you can try to resolve the issue:
-
Reload the browser tab Clipchamp is open in, or close and reopen the Clipchamp app in Windows, then try captioning again.
-
Remove your clip from the editing project, add it again and try captioning again.
-
Turn off auto-captioning, export the project, then import the resulting MP4 video in your project and try the captioning with the new clip version. The background for this suggestion is that if your original input video was of a different format such as WebM, converting it to MP4 can lead to the captioning feature recognizing its audio track correctly.
-
Try the captioning with a different source video to test if the issue lies with one particular input file.
-
Check if your computer's firewall (or your organization's firewall, if you're in a corporate network) or a browser extension you might have installed is blocking connections to the Azure speech to text service. Either whitelist the connection, disable the browser extension on Clipchamp, or connect to another Wifi network to test if autocaptioning starts working.
Frequently asked questions
Who has access to the data?
No one has access to the data. Microsoft Automatic Speech Recognition (ASR) involves no human intervention, meaning no one will have access to the audio at any time. [Learn more].
Does Clipchamp store any caption data?
Yes. Caption data is stored with your Clipchamp video, which can only be accessed by yourself.
If I don't want Clipchamp to process this data to begin with, can I prevent it?
Yes. If you don’t want Clipchamp to process any captions-related data, simply do not turn on the auto-captioning feature.
Important: Microsoft reserves the right to restrict transcription and translation services, with reasonable notice, in order to limit excessive use and/or fraud and to maintain service performance.


